
The Philippines is a tropical paradise that offers something for every type of traveler. From pristine beaches and turquoise waters to lush rice terraces and vibrant cities, this archipelago of over 7,000 islands is a dream destination. If you’re planning a trip to this stunning country, a well-crafted 3 Week Philippines Itinerary is the perfect way to experience its diverse beauty. Whether you’re an adventurer, a beach lover, or a culture enthusiast, this guide will help you make the most of your time in the Philippines.
In this blog post, we’ll walk you through everything you need to know to plan your 3 Week Philippines Itinerary, including the best time to visit, how to get around, top hotels, and a detailed day-by-day breakdown of your trip. We’ll also provide a 3 Week Philippines Itinerary Map to help you visualize your journey. So, let’s dive in and start planning your unforgettable Philippine adventure!
The Best 3 Week Philippines Itinerary
Table of contents
- The Best 3 Week Philippines Itinerary
- Best Time to Visit the Philippines
- How to Get Around the Philippines
- Best Hotels in the Philippines
- 3 Weeks in the Philippines Map
- 3 Weeks in the Philippines Itinerary
- Day 1: From Manila to Banaue
- Day 2-4: Hiking in Banaue
- Day 5: From Banaue to Palawan
- Day 6: Puerto Princesa to El Nido
- Day 7-12: El Nido
- Day 13: From El Nido to Puerto Princesa
- Day 14: From Palawan to Cebu
- Day 15: From Cebu to Bohol
- Day 16: Loboc (Bohol)
- Day 17-18: Panglao (Bohol)
- Day 19: Tagbilaran (Bohol)
- Day 20: From Bohol to Manila
- 3 Week Philippines Itinerary: In Conclusion
Disclosure: Some links in this post are affiliate links. If you make a purchase through one of these links, we may earn a small commission (at no extra cost to you!). We're very grateful when you use our links to make a purchase:-).
Best Time to Visit the Philippines
Planning your 3 Week Philippines Itinerary starts with choosing the right time to visit. The Philippines is a tropical paradise that offers incredible experiences year-round, but the best time to visit depends on your preferences, budget, and the kind of adventure you’re seeking. In this guide, we’ll break down the seasons, weather patterns, and events to help you decide when to embark on your Philippine adventure.
Dry Season (November to April)
The dry season is the most popular time to visit the Philippines, and for good reason. With sunny skies, warm temperatures, and minimal rainfall, it’s the perfect time for beach activities, island hopping, and outdoor adventures.
Highlights of the Dry Season:
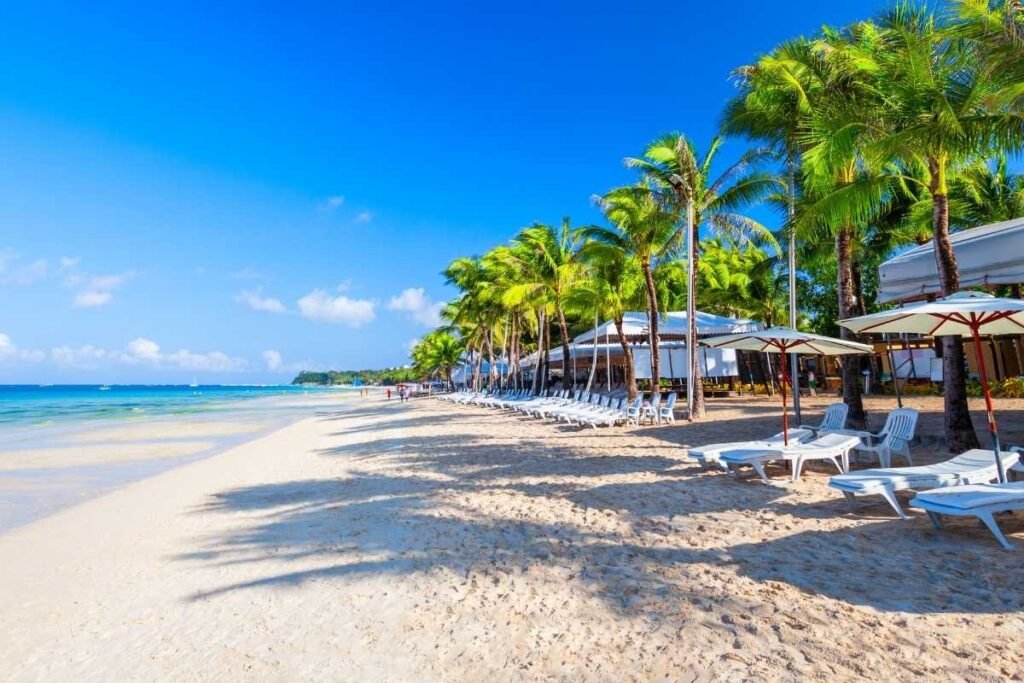
- Perfect Beach Weather: Enjoy crystal-clear waters and white-sand beaches in destinations like Palawan, Boracay, and Cebu.
- Festivals: Experience vibrant cultural events like the Sinulog Festival in Cebu (January) and the Ati-Atihan Festival in Kalibo (January).
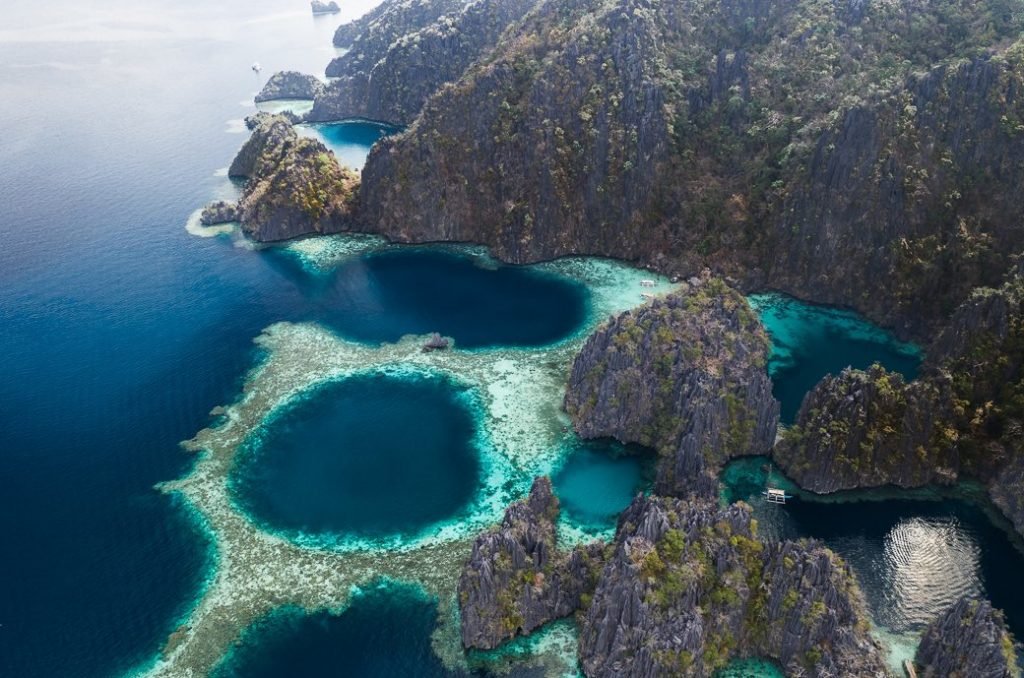
- Ideal for Diving and Snorkeling: Visibility is at its best, making it a great time to explore underwater wonders in El Nido, Coron, and Moalboal.
Tips for Visiting During the Dry Season:
- Book accommodations and flights early, as this is peak tourist season.
- Expect higher prices for hotels and tours.
- Pack light clothing, sunscreen, and a hat to stay comfortable in the heat.
Wet Season (May to October)
The wet season, also known as the monsoon season, brings rain and occasional typhoons to the Philippines. While it may not be the best time for beach activities, it has its own unique charm and advantages.
Highlights of the Wet Season:
- Lush Landscapes: The rain transforms the countryside into a vibrant green paradise, perfect for hiking and exploring rice terraces like those in Banaue.
- Fewer Crowds: Enjoy popular destinations like El Nido and Bohol without the crowds.
- Budget-Friendly Travel: Hotels and flights are often cheaper during this time.
Tips for Visiting During the Wet Season:
- Be flexible with your plans, as weather conditions can change quickly.
- Pack a rain jacket, waterproof shoes, and quick-dry clothing.
- Focus on indoor activities and cultural experiences, such as visiting museums and historical sites.
Shoulder Seasons (November and April)
The months of November and April are considered shoulder seasons, offering a balance between the dry and wet seasons.
Highlights of the Shoulder Seasons:
- Pleasant Weather: Enjoy warm temperatures and occasional rain showers.
- Fewer Tourists: Experience popular destinations without the peak-season crowds.
- Affordable Prices: Find great deals on accommodations and tours.
Tips for Visiting During the Shoulder Seasons:
- Check the weather forecast before your trip to plan accordingly.
- Take advantage of lower prices and fewer crowds to explore top attractions.
Find the best hotel deals for your next trip! Compare prices and book your stay on
HostelWorld (Amazing Hostels & Hotels around the world)
TripAdvisor (Compare hotels, read real reviews, and find the best prices)
Best Time for Specific Activities
Here’s a quick guide to help you plan your 3 Week Philippines Itinerary based on your interests:
- Beach Lovers: Visit during the dry season (November to April) for the best beach weather.
- Adventure Seekers: The wet season (May to October) is ideal for hiking and exploring lush landscapes.
- Budget Travelers: The wet season and shoulder seasons offer the best deals on accommodations and flights.
- Festival Enthusiasts: Plan your trip around January to experience the Sinulog and Ati-Atihan festivals.
No matter when you visit, the Philippines offers a wealth of experiences to include in your 3 Week Philippines Itinerary. However, choosing the right season can enhance your trip. The dry season is perfect for beach lovers, the wet season offers lush scenery and budget-friendly travel, and the shoulder seasons provide a balance of good weather and fewer crowds.
For more travel inspiration, check out our 3 Week Philippines Itinerary and Philippines Travel Budget Guide. Don’t forget to book your accommodations via WayAway.io or Trip.com for the best deals.
The best time to visit the Philippines depends on your preferences, but every season offers something special. Whether you’re exploring pristine beaches, hiking through lush rice terraces, or immersing yourself in vibrant festivals, your 3 Week Philippines Itinerary will be unforgettable.
How to Get Around the Philippines
The Philippines is an archipelago of over 7,000 islands, making transportation a key factor in planning your 3 Week Philippines Itinerary. While getting around the country may seem daunting at first, the Philippines offers a variety of transportation options to suit every traveler’s needs. From domestic flights to ferries, buses, and local tricycles, this guide will help you navigate the Philippines like a pro.
Domestic Flights: The Fastest Way to Travel
Domestic flights are the most efficient way to travel between the Philippines’ major islands, especially if you’re short on time.
Key Airlines:
- Cebu Pacific: Known for its budget-friendly fares and frequent flights.
- Philippine Airlines (PAL): Offers a mix of economy and business class options.
- AirAsia Philippines: Another affordable option with good coverage.
Popular Routes:
- Manila to Palawan (Puerto Princesa or El Nido)
- Manila to Cebu
- Cebu to Bohol
- Manila to Siargao
Tips for Domestic Flights:
- Book flights in advance, especially during peak season (November to April).
- Check baggage allowances, as budget airlines often have strict limits.
- Arrive at the airport at least 2 hours before departure for domestic flights.
Looking for cheap flights or all-in-one travel deals? Check out:
Trip.com (Competitive flight & hotel bundles)
Expedia (Flight + hotel savings)
WayAway.io (Cashback on flights & travel bookings)
Ferries: Scenic and Affordable Island Hopping
Ferries are a popular and affordable way to travel between islands, offering a scenic and relaxing journey.
Key Ferry Operators:
- 2GO Travel: One of the largest ferry companies, offering routes between major islands.
- OceanJet: Known for fast ferries connecting Cebu, Bohol, and other Visayas destinations.
- SuperCat: Operates high-speed ferries in the Visayas region.
Popular Routes:
- Cebu to Bohol
- Cebu to Siquijor
- Batangas (near Manila) to Puerto Galera
Tips for Ferry Travel:
- Book tickets in advance, especially for popular routes.
- Arrive at the port at least 1 hour before departure.
- Bring motion sickness medication if you’re prone to seasickness.
Buses: Comfortable and Convenient for Land Travel
Buses are a great option for traveling within islands, especially in Luzon and Visayas.
Key Bus Companies:
- Philtranco: Offers long-distance routes, including Manila to Banaue.
- Ceres Bus Lines: Operates in the Visayas region, including Cebu and Bohol.
Popular Routes:
- Manila to Banaue (for the rice terraces)
- Manila to Baguio (for the cool mountain climate)
- Cebu City to Moalboal (for diving and beaches)
Tips for Bus Travel:
- Choose air-conditioned buses for comfort.
- Bring snacks and water for long journeys.
- Keep your belongings secure, especially on overnight buses.
Need a ride? Book airport transfers, taxis, or rental cars easily:
Kiwitaxi (Reliable private transfers worldwide)
Rentalcars.com (Compare car rentals for the best price)
For more travel tips, check out our guides on Diving in El Nido and Hiking the Rice Terraces of Batad and Banaue.
Tricycles and Jeepneys: Local Transportation
For short distances and local exploration, tricycles and jeepneys are the way to go.
Tricycles:
- Motorized three-wheeled vehicles that can carry 2-4 passengers.
- Ideal for short trips within towns and cities.
- Negotiate the fare before starting your journey.
Jeepneys:
- Colorful, iconic vehicles that are a symbol of Filipino culture.
- Follow fixed routes and are very affordable.
- Great for experiencing local life, but can be crowded.
Tips for Local Transportation:
- Carry small bills for fares.
- Be prepared for a bumpy ride, especially on jeepneys.
- Don’t hesitate to ask locals for help with routes and fares.
Ride-Hailing Apps: Convenient and Reliable
Ride-hailing apps like Grab are widely available in major cities like Manila, Cebu, and Davao.
Why Use Ride-Hailing Apps?
- Convenient and reliable, especially in urban areas.
- Fixed fares, so no need to negotiate.
- Available 24/7 in most cities.
Tips for Ride-Hailing:
- Download the Grab app before your trip.
- Use the app to book rides to and from airports.
- Have cash on hand, as some drivers may not accept card payments.
Renting a Motorbike or Scooter
Renting a motorbike or scooter is a popular option for exploring smaller islands and rural areas.
Where to Rent:
- Popular destinations like El Nido, Bohol, and Siargao offer motorbike rentals.
- Rental shops are often located near tourist areas.
Tips for Renting a Motorbike:
- Always wear a helmet and follow local traffic rules.
- Check the condition of the bike before renting.
- Carry a map or GPS, as some areas may have limited signage.
3 Week Philippines Itinerary: Transportation Tips
- Plan Ahead: Book domestic flights and ferry tickets in advance, especially during peak season.
- Combine Modes: Use a mix of flights, ferries, and buses to save time and money.
- Stay Flexible: Be prepared for delays, especially during the wet season.
- Pack Light: Traveling between islands is easier with less luggage.
For more travel inspiration, check out our 3 Week Philippines Itinerary and Philippines Travel Budget Guide. Don’t forget to book your accommodations via WayAway.io or Trip.com for the best deals.
Getting around the Philippines is an adventure in itself, offering a mix of modern convenience and local charm. By understanding your transportation options, you can make the most of your 3 Week Philippines Itinerary and explore this tropical paradise with ease.
Best Hotels in the Philippines
Finding the right accommodation is key to enjoying your 3 Week Philippines Itinerary. Here are some top recommendations:
- El Nido Resorts (Palawan): Luxury beachfront resorts offering stunning views and world-class amenities.
- The Funny Lion (Palawan): A boutique hotel with a jungle vibe and easy access to El Nido’s attractions.
- Amorita Resort (Bohol): A luxurious resort on Panglao Island, perfect for relaxation.
- Seda Banaue (Banaue): A comfortable hotel with breathtaking views of the rice terraces.
Find the best hotel deals for your next trip! Compare prices and book your stay on
HostelWorld (Amazing Hostels & Hotels around the world)
TripAdvisor (Compare hotels, read real reviews, and find the best prices)
3 Weeks in the Philippines Map

On the map of the Philippines you can find the itinerary we followed during our 3 weeks in the Philippines.
We've also included our Philippines accommodation and all the highlights we visited in Luzon, Palawan, and Bohol.
If you want to know more about the costs of our Philippines travel itinerary, be sure to check out our Philippines budget post.
3 Weeks in the Philippines Itinerary
Here’s our detailed 3 Week Philippines Itinerary to help you plan your trip:
Day 1: From Manila to Banaue
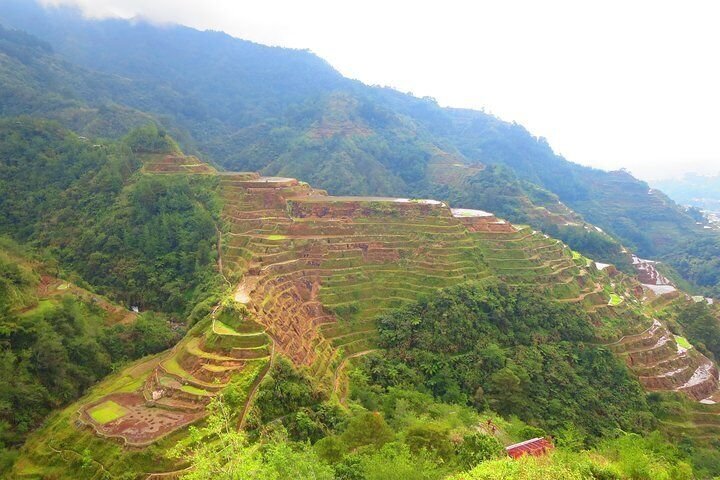
Your 3 Week Philippines Itinerary begins with an exciting journey from Manila to Banaue, home of the world-famous Banaue Rice Terraces. This UNESCO World Heritage Site is often referred to as the "Eighth Wonder of the World" and is a must-see for any traveler visiting the Philippines. Here’s a detailed guide to help you plan your first day, including transportation options, things to do, and tips for a smooth trip.
Getting from Manila to Banaue
Banaue is located in the northern part of Luzon, approximately 330 kilometers (205 miles) from Manila. The journey takes around 8-10 hours, depending on the mode of transportation and road conditions.
Option 1: By Bus (Most Popular)
- Bus Companies: Coda Lines and Ohayami Trans operate nightly buses from Manila to Banaue.
- Departure Point: Buses depart from Sampaloc, Manila, near the University of Santo Tomas (UST).
- Travel Time: 8-10 hours.
- Cost: Approximately PHP 450-500 (USD 9-10) one way.
Tips for Bus Travel:
- Book your ticket in advance, especially during peak season.
- Bring a jacket or blanket, as the buses can get cold.
- Pack snacks and water for the journey.
Option 2: By Private Van or Car
- If you prefer a more comfortable and flexible option, you can hire a private van or drive yourself.
- Travel Time: 8-10 hours, depending on traffic and stops.
- Cost: Hiring a private van can cost around PHP 8,000-10,000 (USD 160-200) for a round trip.
Tips for Private Travel:
- Start early to avoid Manila’s heavy traffic.
- Take breaks along the way to enjoy the scenic views.
Option 3: By Flight + Land Transfer
- Fly from Manila to Cauayan Airport (the nearest airport to Banaue) and then take a van or bus to Banaue.
- Travel Time: 1-hour flight + 3-4 hours by land.
- Cost: Flights start at around PHP 2,000 (USD 40) one way.
Tips for Flying:
- Check flight schedules, as there are limited flights to Cauayan.
- Arrange for a van transfer in advance to avoid waiting.
Arriving in Banaue
Once you arrive in Banaue, check into your accommodation and take some time to rest after your journey. Here are some recommended hotels:
- Banaue Hotel: A government-run hotel with stunning views of the rice terraces.
- Ramon’s Native Homestay: A budget-friendly option with a local touch.
- Sanafe Lodge and Restaurant: Offers comfortable rooms and a great restaurant.
Book top-rated tours and attractions on :
Viator (Best for curated global tours)
GetYourGuide (Skip-the-line tickets & local guides)
Klook (Great for Asia adventures & discounts)
For the best deals, book your stay via WayAway.io or Trip.com.
Things to Do on Your First Day in Banaue
While your first day is mostly about traveling, you can still squeeze in some light activities if you arrive early.
1. Visit the Banaue Viewpoint
- Head to the Banaue Viewpoint for your first glimpse of the iconic rice terraces.
- Take photos and soak in the breathtaking scenery.
2. Explore the Banaue Town Proper
- Stroll around the town and visit the Banaue Ethnic Village to learn about the local Ifugao culture.
- Shop for handmade souvenirs like wood carvings and woven fabrics.
3. Relax and Prepare for Day 2
- Enjoy a hearty meal at a local restaurant. Try traditional Ifugao dishes like pinikpikan (chicken stew) and tinawon rice.
- Rest early to prepare for an exciting day of hiking and exploring the rice terraces.
Tips for Day 1
- Pack Light: Bring only the essentials for your stay in Banaue.
- Dress Comfortably: Wear layers, as the weather can be cool in the mountains.
- Stay Hydrated: Drink plenty of water, especially if you’re traveling by bus.
Your first day in the Philippines is all about transitioning from the bustling city of Manila to the serene beauty of Banaue. While it’s mostly a travel day, the journey itself is an adventure, offering glimpses of the country’s stunning landscapes and rich culture.
For more travel inspiration, check out our guide on Hiking the Rice Terraces of Batad and Banaue. Don’t forget to book your accommodations via WayAway.io or Trip.com for the best deals.
Day 2-4: Hiking in Banaue

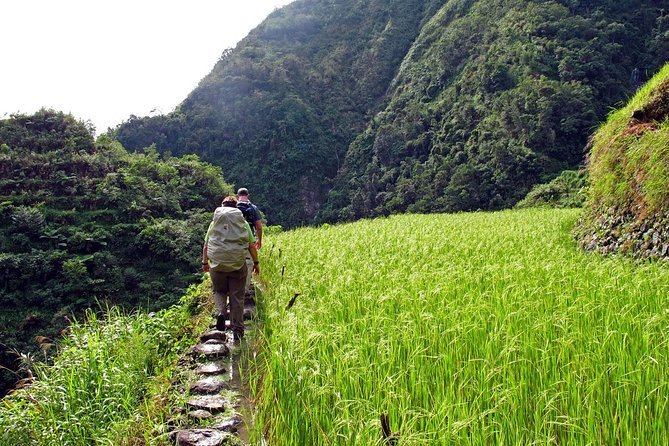
The next three days of your 3 Week Philippines Itinerary are all about immersing yourself in the natural beauty and cultural heritage of Banaue. Known for its stunning rice terraces and rich Ifugao culture, Banaue offers some of the most rewarding hiking experiences in the Philippines. From exploring the UNESCO-listed rice terraces to visiting remote villages and waterfalls, here’s a detailed guide to help you make the most of your time in Banaue.
Day 2: Exploring the Banaue Rice Terraces
1. Sunrise at the Banaue Viewpoint
- Start your day early with a visit to the Banaue Viewpoint to catch the sunrise over the rice terraces.
- The golden light illuminating the terraces is a sight you’ll never forget.
2. Hike to Bangaan Village
- After breakfast, embark on a hike to Bangaan Village, a traditional Ifugao village nestled among the rice terraces.
- The hike takes about 2-3 hours round trip and offers stunning views of the terraces and the village below.
3. Visit the Banaue Ethnic Village
- Return to Banaue town and visit the Banaue Ethnic Village to learn about the Ifugao people’s history, culture, and traditions.
- Watch a cultural performance and shop for handmade souvenirs.
4. Relax and Enjoy Local Cuisine
- End your day with a hearty meal at a local restaurant. Try pinikpikan (chicken stew) and tinawon rice, a traditional Ifugao variety.
Day 3: Hiking to Batad and Tappiya Falls
1. Travel to Batad
- Take a jeepney or van from Banaue to Batad, a remote village famous for its amphitheater-like rice terraces.
- The journey takes about 1-2 hours, depending on road conditions.
2. Hike to the Batad Rice Terraces
- Upon arrival, start your hike through the Batad Rice Terraces, a UNESCO World Heritage Site.
- The terraces are incredibly photogenic, so take your time to capture the beauty.
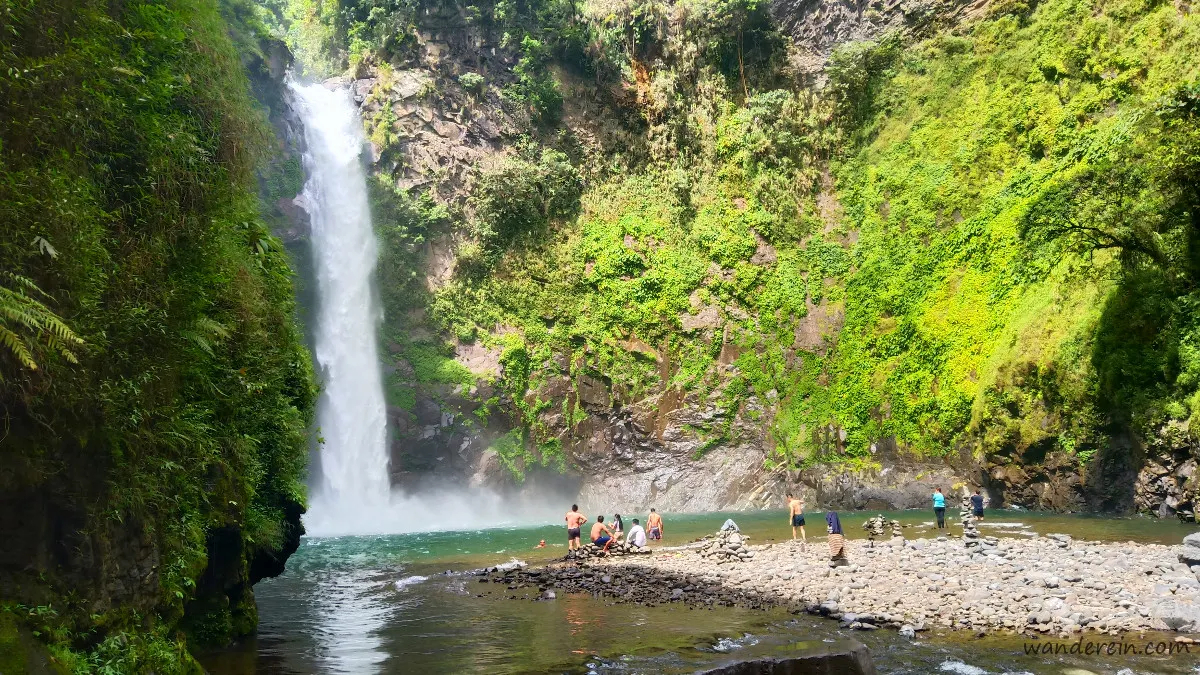
3. Visit Tappiya Falls
- Continue your hike to Tappiya Falls, a stunning waterfall located near Batad.
- The hike takes about 1-2 hours round trip and involves some steep and slippery sections, so wear sturdy shoes.
- Take a refreshing dip in the cool waters of the falls before heading back to Batad.
4. Overnight in Batad
- Spend the night in Batad to fully experience the village’s peaceful atmosphere.
- Recommended accommodations: Ramon’s Native Homestay or Batad Top Viewpoint Homestay.
Day 4: Exploring Hapao and Hungduan Rice Terraces
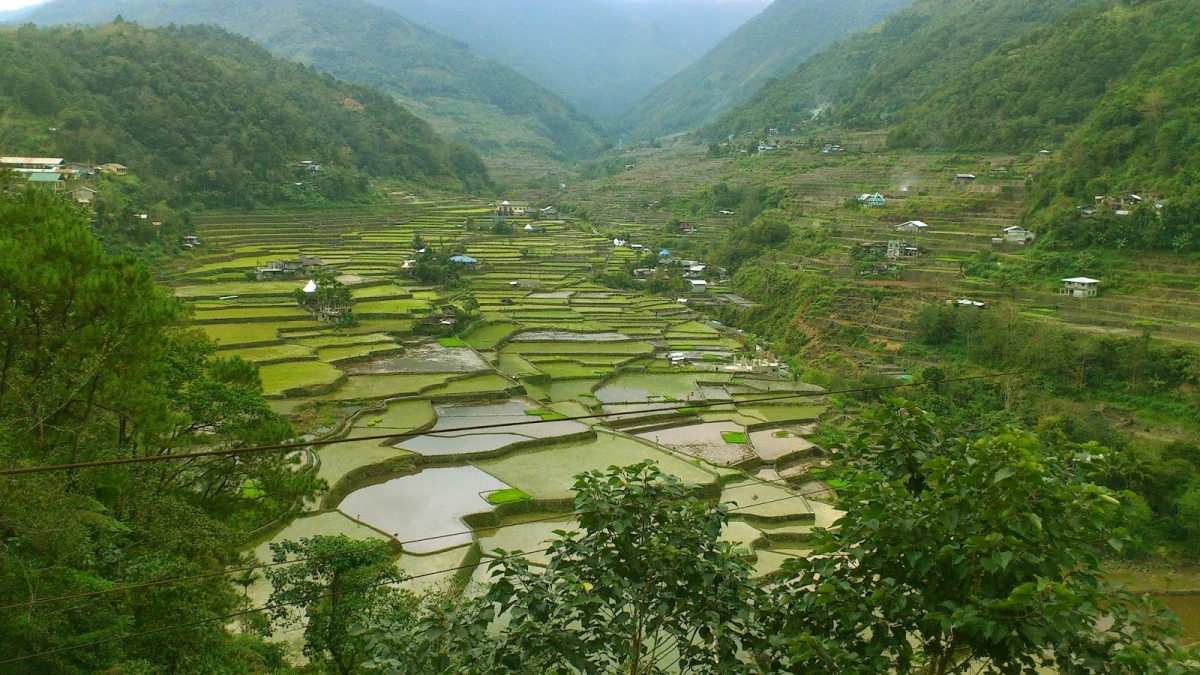
1. Travel to Hapao
- After breakfast, travel to Hapao, another area known for its beautiful rice terraces.
- The journey takes about 1-2 hours by jeepney or van.
2. Hike Through the Hapao Rice Terraces
- Explore the Hapao Rice Terraces, which are equally stunning but less crowded than Batad.
- The hike is relatively easy and offers plenty of opportunities for photography.
3. Visit Hungduan Rice Terraces
- Continue to Hungduan, where you’ll find more terraces and the iconic Hapao Hot Springs.
- Soak in the natural hot springs to relax your muscles after days of hiking.
4. Return to Banaue
- Head back to Banaue in the late afternoon and enjoy a well-deserved rest.
- Spend your evening reflecting on your adventures and preparing for the next leg of your 3 Week Philippines Itinerary.
Tips for Hiking in Banaue
- Wear Comfortable Shoes: The trails can be steep and slippery, so sturdy hiking shoes are a must.
- Pack Light: Bring only the essentials, such as water, snacks, sunscreen, and a rain jacket.
- Hire a Guide: Local guides are available and highly recommended, especially for hikes to Batad and Tappiya Falls.
- Respect Local Culture: Be mindful of the Ifugao people’s traditions and avoid damaging the rice terraces.
Your three days in Banaue will be filled with unforgettable experiences, from hiking through breathtaking rice terraces to immersing yourself in the local culture. These days are a highlight of your 3 Week Philippines Itinerary, offering a perfect blend of adventure and cultural exploration.
For more travel inspiration, check out our guide on Hiking the Rice Terraces of Batad and Banaue.
Day 5: From Banaue to Palawan
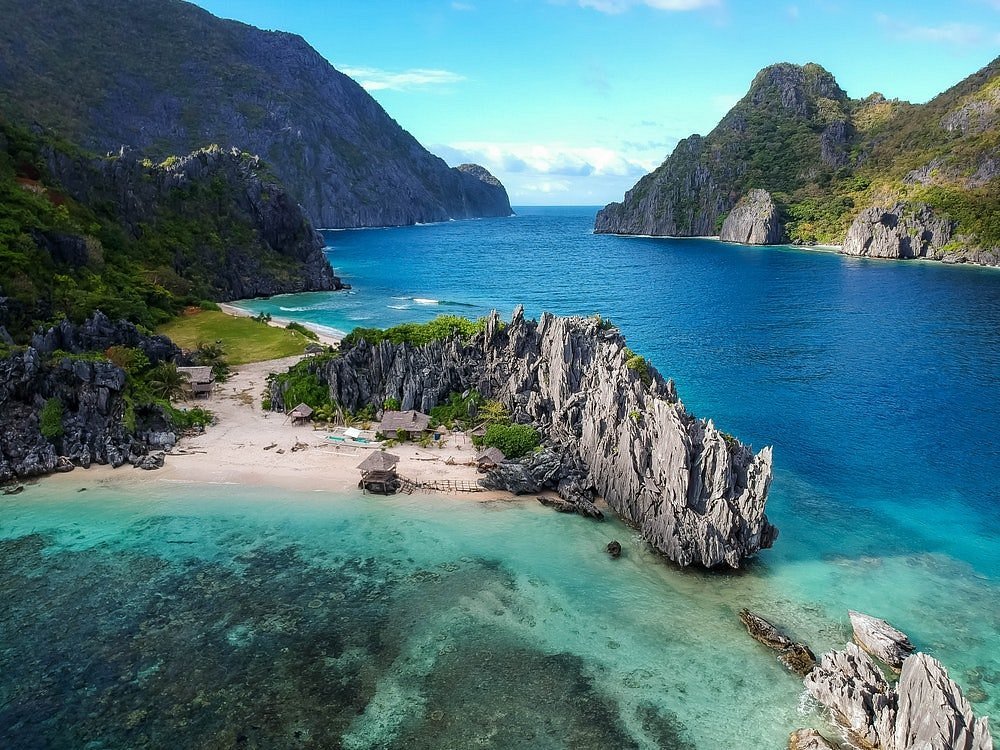
After three incredible days exploring the rice terraces and cultural treasures of Banaue, it’s time to move on to the next highlight of your 3 Week Philippines Itinerary: Palawan. Known for its pristine beaches, crystal-clear waters, and stunning limestone cliffs, Palawan is often referred to as the "Last Frontier" of the Philippines. This day is all about transitioning from the mountains of Luzon to the tropical paradise of Palawan. Here’s a detailed guide to help you plan your journey.
Getting from Banaue to Palawan
Traveling from Banaue to Palawan involves a combination of land and air travel. The most common route is to return to Manila and then fly to Palawan. Here’s how to do it:
Step 1: Banaue to Manila
- By Bus: Take a bus from Banaue back to Manila. Buses like Ohayami Trans and Coda Lines operate daily trips.
- Travel Time: 8-10 hours.
- Cost: Approximately PHP 450-500 (USD 9-10) one way.
- By Private Van: If you prefer a more comfortable option, hire a private van.
- Travel Time: 8-10 hours.
- Cost: Around PHP 8,000-10,000 (USD 160-200) for a round trip.
Tips for the Journey:
- Book your bus ticket in advance, especially if traveling during peak season.
- Bring snacks, water, and a jacket for the bus ride.
Step 2: Manila to Palawan
- By Flight: From Manila, take a domestic flight to Puerto Princesa, the capital of Palawan.
- Airlines: Cebu Pacific, Philippine Airlines, and AirAsia offer frequent flights.
- Travel Time: 1.5 hours.
- Cost: Flights start at around PHP 2,000 (USD 40) one way.
Tips for Flying:
- Book your flight in advance to secure the best prices.
- Arrive at the airport at least 2 hours before departure.
Book top-rated tours and attractions on :
Viator (Best for curated global tours)
GetYourGuide (Skip-the-line tickets & local guides)
Klook (Great for Asia adventures & discounts)
Arriving in Puerto Princesa
Once you arrive in Puerto Princesa, check into your accommodation and take some time to rest after your journey. Here are some recommended hotels:
- Princesa Garden Island Resort & Spa: A luxurious option with beachfront views.
- Go Hotels Puerto Princesa: A budget-friendly hotel with modern amenities.
- Canvas Boutique Hotel: A mid-range option with a cozy vibe.
For the best deals, book your stay via WayAway.io or Trip.com.
Things to Do in Puerto Princesa
If you arrive early and have some energy left, here are a few activities to kick off your Palawan adventure:
1. Visit the Palawan Wildlife Rescue and Conservation Center
- Also known as the Crocodile Farm, this center is home to rescued crocodiles and other wildlife.
- Learn about conservation efforts and see these fascinating creatures up close.
2. Stroll Along Baywalk
- Take a leisurely walk along Baywalk, a scenic promenade by the sea.
- Enjoy the fresh ocean breeze and grab a snack at one of the food stalls.
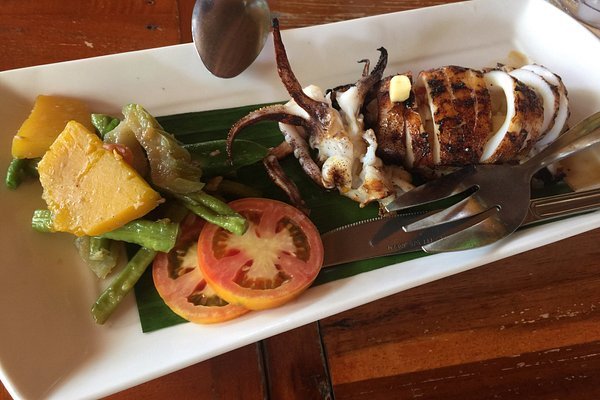
3. Try Local Cuisine
- Sample Palawan’s local dishes, such as chicken inasal (grilled chicken) and lato salad (seaweed salad).
- Recommended restaurants: Ka Lui and Kinabuchs Grill & Bar.
Tips for Day 5
- Pack Smart: Bring essentials like sunscreen, a hat, and light clothing for Palawan’s tropical climate.
- Stay Hydrated: Drink plenty of water, especially after a long day of travel.
- Rest Up: Get a good night’s sleep to prepare for the adventures ahead in Palawan.
Day 5 of your 3 Week Philippines Itinerary is all about transitioning from the mountains of Banaue to the tropical paradise of Palawan. While it’s mostly a travel day, arriving in Puerto Princesa marks the beginning of an exciting new chapter in your Philippine adventure.
For more travel inspiration, check out our El Nido Travel Guide and Diving in El Nido. Don’t forget to book your accommodations via WayAway.io or Trip.com for the best deals.
Day 6: Puerto Princesa to El Nido
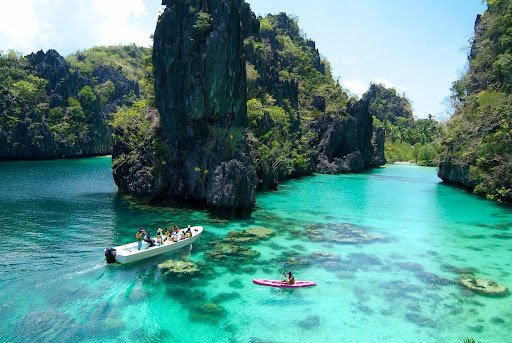
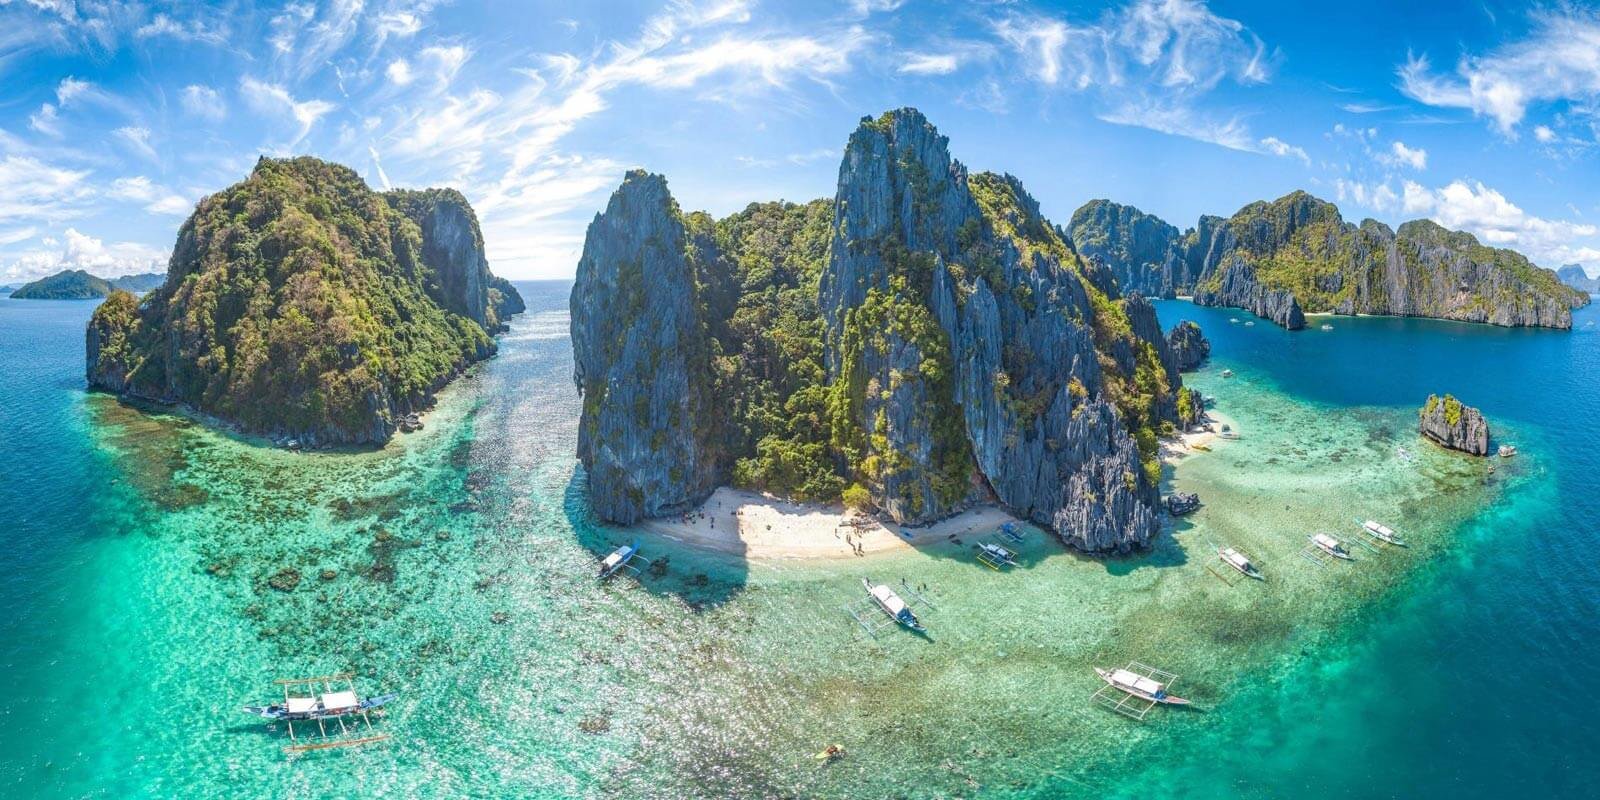
On Day 6 of your 3 Week Philippines Itinerary, you’ll travel from Puerto Princesa to El Nido, the crown jewel of Palawan. Known for its jaw-dropping limestone cliffs, turquoise lagoons, and pristine beaches, El Nido is a paradise for beach lovers and adventurers alike. While the journey from Puerto Princesa to El Nido is long, the destination is well worth the effort. Here’s a detailed guide to help you plan your trip.
Getting from Puerto Princesa to El Nido
The journey from Puerto Princesa to El Nido takes approximately 5-7 hours, depending on the mode of transportation and road conditions. Here are your options:
Option 1: By Van (Most Popular)
- Van Operators: Companies like Fort Wally, Eulen Joy, and Daytripper Palawan offer shared or private van transfers.
- Travel Time: 5-7 hours.
- Cost: Shared vans cost around PHP 600-800 (USD 12-16) per person, while private vans cost PHP 4,000-5,000 (USD 80-100).
Tips for Van Travel:
- Book your van in advance, especially during peak season.
- Choose a morning departure to arrive in El Nido by early afternoon.
- Bring snacks, water, and a neck pillow for comfort.
Option 2: By Bus
- Bus Companies: Cherry Bus and Roro Bus operate daily trips from Puerto Princesa to El Nido.
- Travel Time: 6-8 hours.
- Cost: Approximately PHP 500-700 (USD 10-14) one way.
Tips for Bus Travel:
- Buses are cheaper but slower and less comfortable than vans.
- Bring a jacket, as the air conditioning can be strong.
Option 3: By Flight (Fastest Option)
- Airlines: AirSwift offers flights from Puerto Princesa to El Nido.
- Travel Time: 1 hour.
- Cost: Flights start at around PHP 3,000 (USD 60) one way.
Tips for Flying:
- Flights are limited and can be expensive, so book early.
- This option is ideal if you’re short on time or prefer to avoid long land travel.
Need a ride? Book airport transfers, taxis, or rental cars easily:
Kiwitaxi (Reliable private transfers worldwide)
Rentalcars.com (Compare car rentals for the best price)
Arriving in El Nido
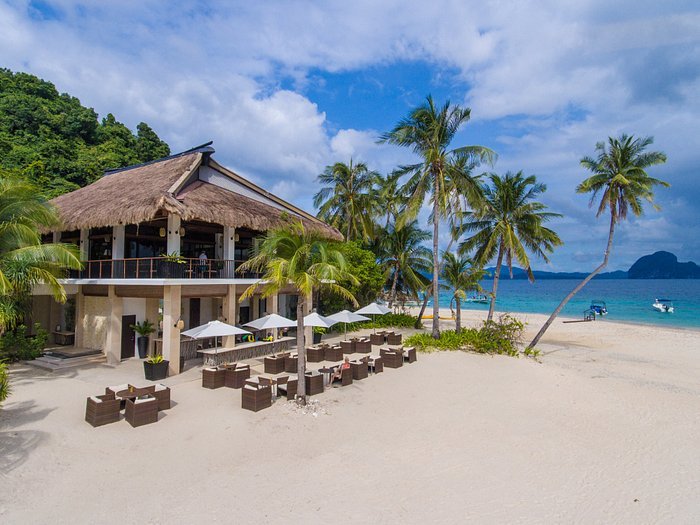
Once you arrive in El Nido, check into your accommodation and take some time to relax. Here are some recommended hotels:
- El Nido Resorts (Pangulasian Island): A luxury resort with stunning beachfront views.
- The Funny Lion: A boutique hotel with a jungle vibe and easy access to El Nido’s attractions.
- Spin Designer Hostel: A budget-friendly option with a social atmosphere.
Find the best hotel deals for your next trip! Compare prices and book your stay on
HostelWorld (Amazing Hostels & Hotels around the world)
TripAdvisor (Compare hotels, read real reviews, and find the best prices)
Things to Do on Your First Day in El Nido
If you arrive early and have some energy left, here are a few activities to kick off your El Nido adventure:
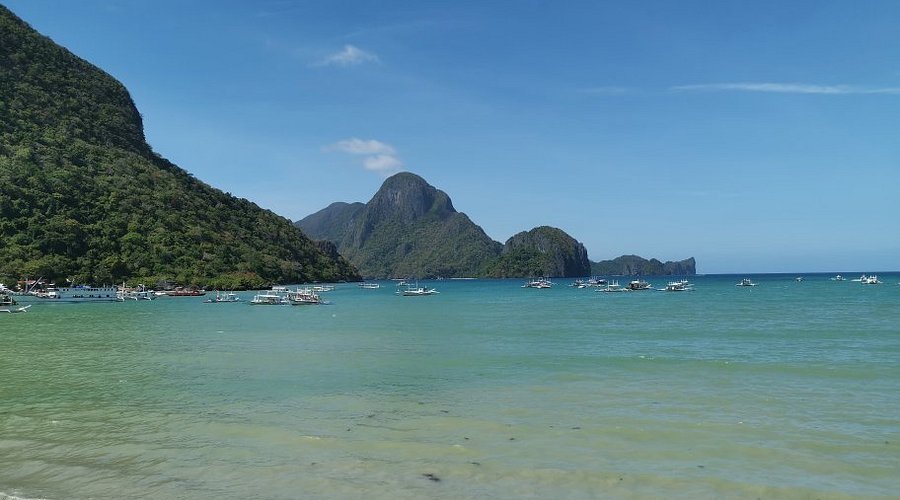
1. Explore El Nido Town
- Stroll around El Nido Town and soak in its laid-back vibe.
- Visit the local market to shop for souvenirs and try street food.
2. Relax at Corong-Corong Beach
- Head to Corong-Corong Beach, just a short tricycle ride from town.
- Watch the sunset and enjoy the peaceful atmosphere.
3. Try Local Cuisine
- Sample El Nido’s fresh seafood and local dishes at restaurants like Altrove (for pizza) and Happiness Beach Bar (for cocktails and snacks).
Tips for Day 6
- Pack Light: Bring only the essentials for your stay in El Nido.
- Stay Hydrated: Drink plenty of water, especially after a long journey.
- Rest Up: Get a good night’s sleep to prepare for the adventures ahead.
Day 6 of your 3 Week Philippines Itinerary is all about transitioning from Puerto Princesa to the stunning island of El Nido. While the journey is long, the reward is a tropical paradise that will take your breath away.
For more travel inspiration, check out our El Nido Travel Guide and Diving in El Nido. Don’t forget to book your accommodations via WayAway.io or Trip.com for the best deals.
Day 7-12: El Nido
Welcome to the heart of your 3 Week Philippines Itinerary – El Nido, a tropical paradise that will leave you spellbound. With its towering limestone cliffs, hidden lagoons, and pristine beaches, El Nido is a dream destination for beach lovers, adventurers, and nature enthusiasts. Over the next six days, you’ll explore the best of what El Nido has to offer, from island-hopping tours to diving, kayaking, and more. Here’s a detailed guide to help you make the most of your time in El Nido.
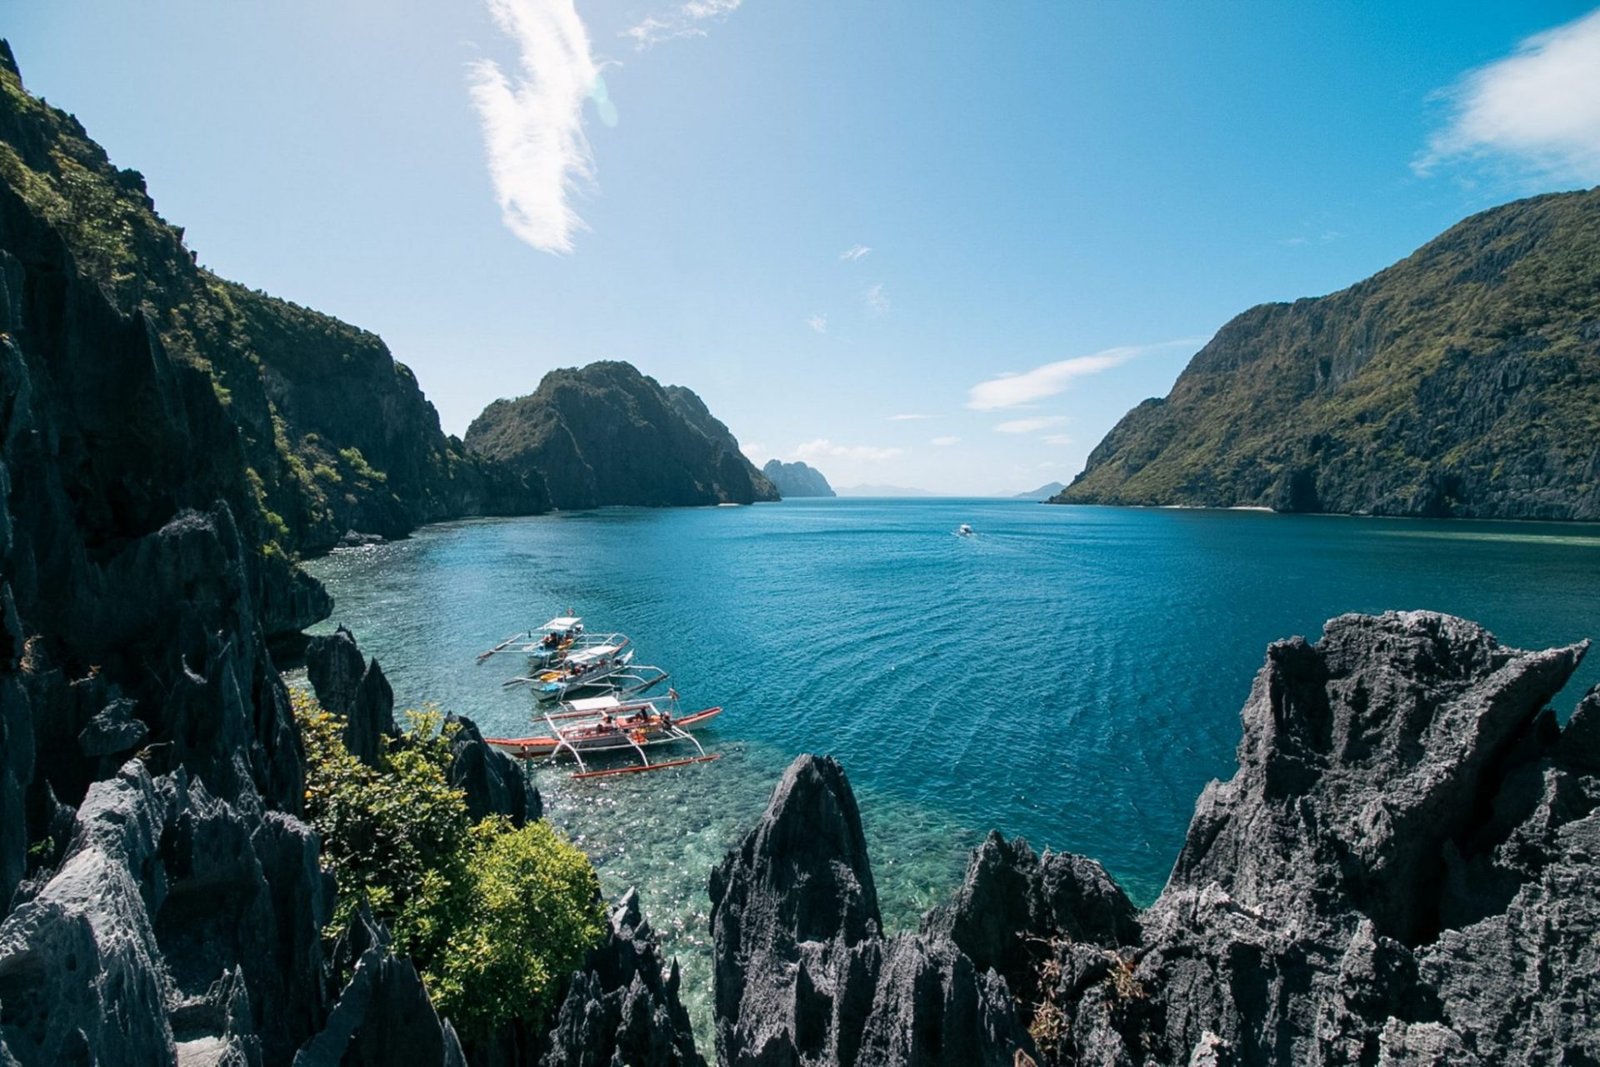
Day 7: Island Hopping Tour A

Island Hopping Tour A is the most popular tour in El Nido, and for good reason. It includes some of the area’s most iconic spots.
Highlights of Tour A:
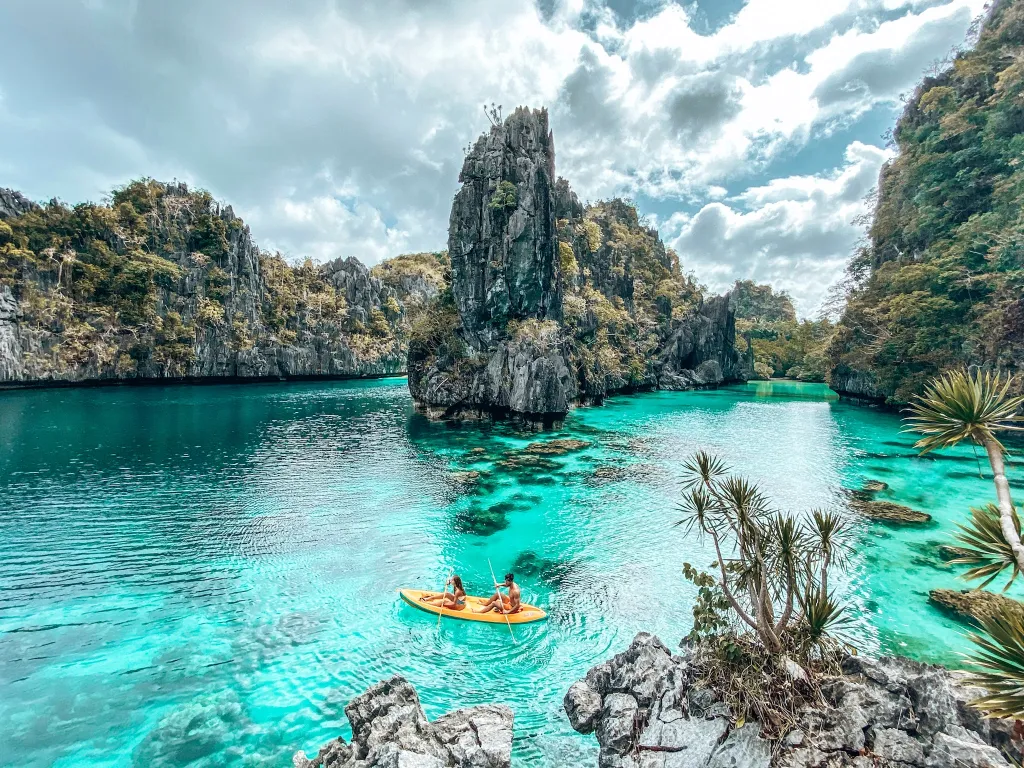
- Big Lagoon: Kayak or swim in this stunning turquoise lagoon surrounded by limestone cliffs.
- Small Lagoon: Paddle through a narrow entrance to discover this hidden gem.
- Secret Lagoon: Accessible through a small crevice, this secluded lagoon is perfect for swimming.
- Shimizu Island: Enjoy snorkeling in crystal-clear waters teeming with marine life.
- 7 Commando Beach: Relax on this picturesque beach with powdery white sand.
Tips for Tour A:
- Book your tour in advance, especially during peak season.
- Bring a waterproof bag for your belongings and plenty of sunscreen.
Day 8: Island Hopping Tour C
Tour C is another must-do, offering a mix of stunning beaches, hidden lagoons, and snorkeling spots.
Highlights of Tour C:
- Hidden Beach: Accessible only during low tide, this beach is a true hidden gem.
- Secret Beach: Swim through a small opening to reach this secluded beach.
- Matinloc Shrine: Explore this abandoned shrine with panoramic views of the sea.
- Talisay Beach: Relax on this quiet beach with crystal-clear waters.
- Helicopter Island: Named for its unique shape, this island is perfect for snorkeling and beachcombing.
Tips for Tour C:
- Wear water shoes, as some areas have sharp coral.
- Bring a GoPro or underwater camera to capture the marine life.
Day 9: Island Hopping Tour B or D

Choose between Tour B or D to explore more of El Nido’s beauty.
Highlights of Tour B:
- Snake Island: Walk along a sandbar that connects two islands.
- Pangulasian Island: Relax on a private beach with stunning views.
- Cudugnon Cave: Explore this historic cave with unique rock formations.
Highlights of Tour D:
- Cadlao Lagoon: Kayak or swim in this serene lagoon.
- Paradise Beach: Unwind on one of El Nido’s most beautiful beaches.
- Pasandigan Beach: Enjoy snorkeling and beachcombing.
Tips for Tour B/D:
- Both tours are less crowded than Tour A and C, offering a more peaceful experience.
- Choose based on your preferences – Tour B for caves and sandbars, Tour D for beaches and lagoons.
Day 10: Diving in El Nido
El Nido is a diver’s paradise, with vibrant coral reefs, diverse marine life, and unique underwater landscapes.
Top Dive Sites:
- South Miniloc: Known for its coral gardens and schools of fish.
- Dilumacad Tunnel: A thrilling dive through a natural tunnel.
- North Rock: Famous for its strong currents and large pelagic species.
Tips for Diving:
- Book with a reputable dive operator like Submariner Diving Center or Deep Blue Seafari.
- If you’re not certified, consider taking a Discover Scuba Diving course.
For more details, check out our guide on Diving in El Nido.
Day 11: Kayaking and Beach Day
Take a break from island hopping and enjoy a relaxing day of kayaking and beachcombing.
Top Kayaking Spots:
- Big Lagoon: Paddle through calm waters surrounded by towering cliffs.
- Small Lagoon: Explore this hidden gem at your own pace.
- Cadlao Lagoon: A quieter alternative with stunning views.
Beach Recommendations:
- Nacpan Beach: A 4-kilometer stretch of golden sand, perfect for sunbathing and swimming.
- Las Cabanas Beach: Known for its stunning sunsets and beachfront bars.
Tips for Kayaking:
- Rent a kayak from a local operator and explore independently.
- Bring a waterproof bag for your belongings.
Book top-rated tours and attractions on :
Viator (Best for curated global tours)
GetYourGuide (Skip-the-line tickets & local guides)
Klook (Great for Asia adventures & discounts)
Day 12: Explore El Nido Town and Relax
Spend your final day in El Nido exploring the town and soaking in its laid-back vibe.
Things to Do in El Nido Town:
- Shop for Souvenirs: Visit the local market for handmade crafts and jewelry.
- Try Local Cuisine: Sample fresh seafood and local dishes at restaurants like Altrove and Happiness Beach Bar.
- Relax at a Spa: Treat yourself to a massage or spa treatment to unwind after days of adventure.
Tips for Days 7-12 in El Nido
- Book Tours in Advance: Popular tours like Tour A and C fill up quickly, so book early.
- Stay Hydrated: Drink plenty of water, especially during island-hopping tours.
- Respect the Environment: Avoid touching coral or littering to help preserve El Nido’s natural beauty.
Your six days in El Nido will be filled with unforgettable experiences, from island hopping and diving to kayaking and relaxing on pristine beaches. These days are a highlight of your 3 Week Philippines Itinerary, offering a perfect blend of adventure and relaxation.
For more travel inspiration, check out our El Nido Travel Guide and Philippines Travel Budget Guide. Don’t forget to book your accommodations via WayAway.io or Trip.com for the best deals.
Day 13: From El Nido to Puerto Princesa
After six unforgettable days in El Nido, it’s time to return to Puerto Princesa on Day 13 of your 3 Week Philippines Itinerary. While the journey back may feel bittersweet, it’s an opportunity to reflect on your adventures and prepare for the next leg of your trip. Here’s a detailed guide to help you plan your journey from El Nido to Puerto Princesa, including transportation options, things to do, and tips for a smooth trip.
Getting from El Nido to Puerto Princesa
The journey from El Nido to Puerto Princesa takes approximately 5-7 hours, depending on the mode of transportation and road conditions. Here are your options:
Option 1: By Van (Most Popular)
- Van Operators: Companies like Fort Wally, Eulen Joy, and Daytripper Palawan offer shared or private van transfers.
- Travel Time: 5-7 hours.
- Cost: Shared vans cost around PHP 600-800 (USD 12-16) per person, while private vans cost PHP 4,000-5,000 (USD 80-100).
Tips for Van Travel:
- Book your van in advance, especially during peak season.
- Choose a morning departure to arrive in Puerto Princesa by early afternoon.
- Bring snacks, water, and a neck pillow for comfort.
Option 2: By Bus
- Bus Companies: Cherry Bus and Roro Bus operate daily trips from El Nido to Puerto Princesa.
- Travel Time: 6-8 hours.
- Cost: Approximately PHP 500-700 (USD 10-14) one way.
Tips for Bus Travel:
- Buses are cheaper but slower and less comfortable than vans.
- Bring a jacket, as the air conditioning can be strong.
Option 3: By Flight (Fastest Option)
- Airlines: AirSwift offers flights from El Nido to Puerto Princesa.
- Travel Time: 1 hour.
- Cost: Flights start at around PHP 3,000 (USD 60) one way.
Tips for Flying:
- Flights are limited and can be expensive, so book early.
- This option is ideal if you’re short on time or prefer to avoid long land travel.
Arriving in Puerto Princesa
Once you arrive in Puerto Princesa, check into your accommodation and take some time to relax. Here are some recommended hotels:
- Princesa Garden Island Resort & Spa: A luxurious option with beachfront views.
- Go Hotels Puerto Princesa: A budget-friendly hotel with modern amenities.
- Canvas Boutique Hotel: A mid-range option with a cozy vibe.
For the best deals, book your stay via WayAway.io or Trip.com.
Things to Do in Puerto Princesa
If you arrive early and have some energy left, here are a few activities to enjoy in Puerto Princesa:
1. Visit the Palawan Wildlife Rescue and Conservation Center
- Also known as the Crocodile Farm, this center is home to rescued crocodiles and other wildlife.
- Learn about conservation efforts and see these fascinating creatures up close.
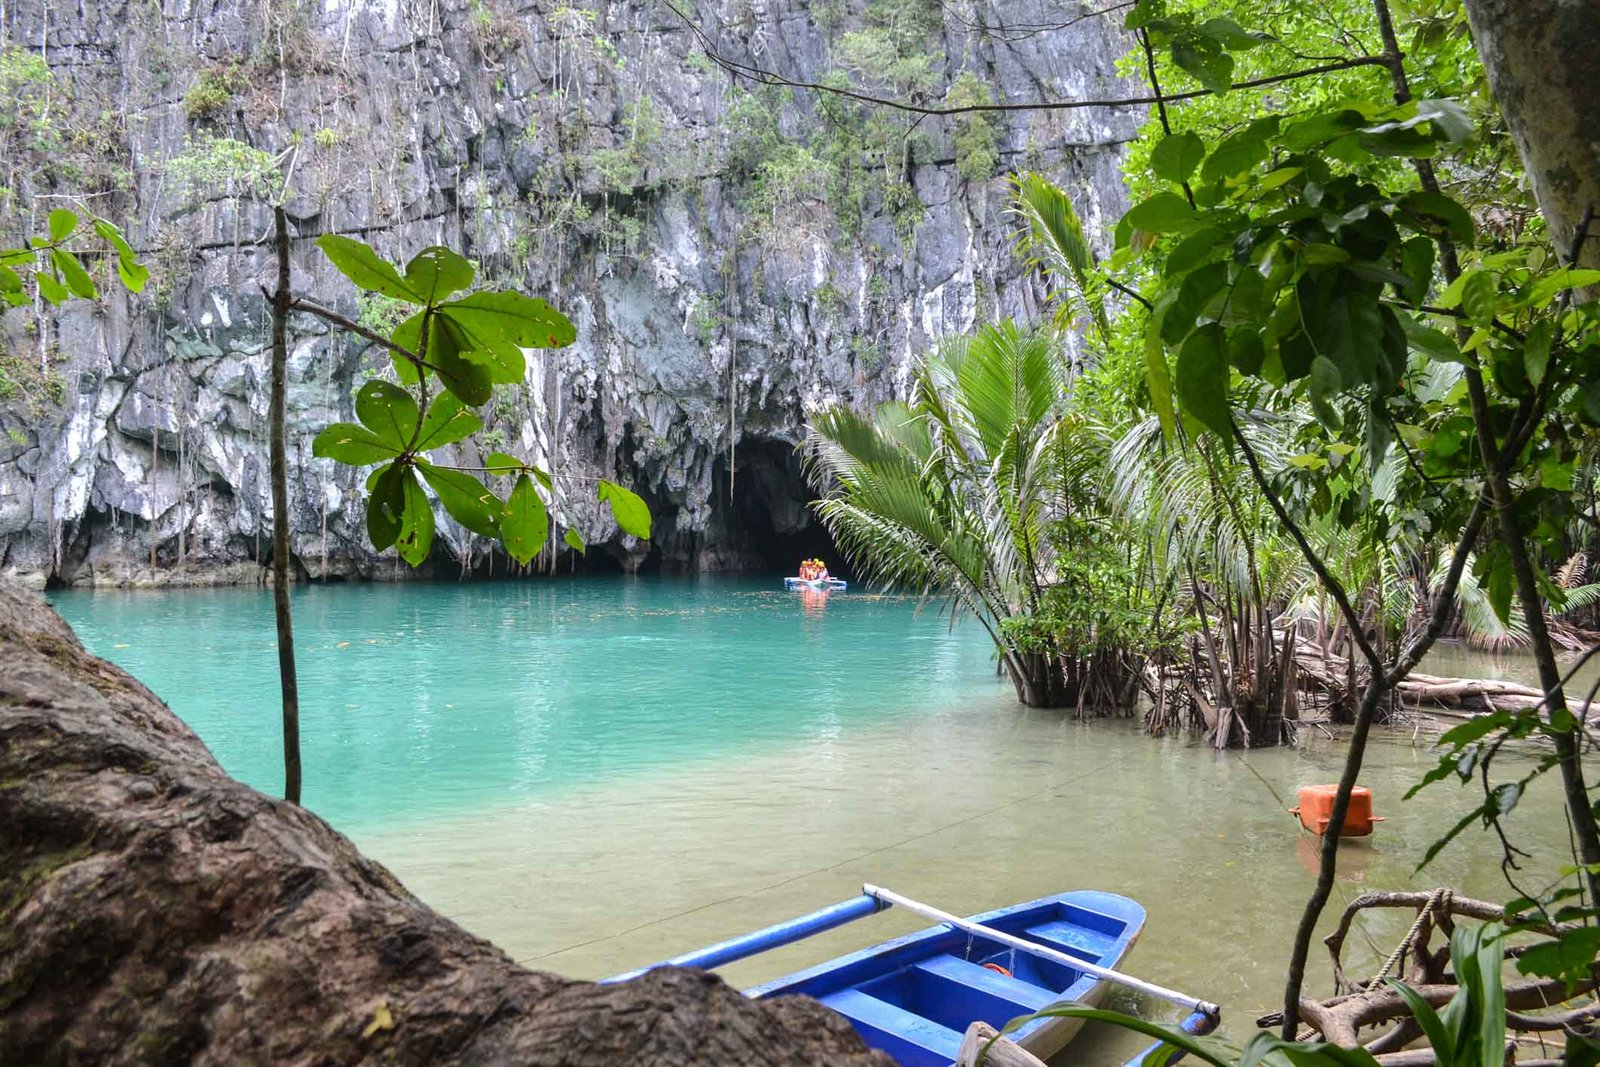
2. Explore the Underground River
- If you missed it earlier, take a day trip to the Puerto Princesa Subterranean River National Park, a UNESCO World Heritage Site.
- Enjoy a boat tour through the stunning underground river and its limestone caves.
3. Stroll Along Baywalk
- Take a leisurely walk along Baywalk, a scenic promenade by the sea.
- Enjoy the fresh ocean breeze and grab a snack at one of the food stalls.
4. Try Local Cuisine
- Sample Palawan’s local dishes, such as chicken inasal (grilled chicken) and lato salad (seaweed salad).
- Recommended restaurants: Ka Lui and Kinabuchs Grill & Bar.
Tips for Day 13
- Pack Light: Bring only the essentials for your stay in Puerto Princesa.
- Stay Hydrated: Drink plenty of water, especially after a long journey.
- Rest Up: Get a good night’s sleep to prepare for the adventures ahead.
Day 13 of your 3 Week Philippines Itinerary is all about transitioning from the stunning island of El Nido back to Puerto Princesa. While it’s mostly a travel day, arriving in Puerto Princesa marks the beginning of the next chapter in your Philippine adventure.
For more travel inspiration, check out our Philippines Travel Budget Guide and El Nido Travel Guide. Don’t forget to book your accommodations via WayAway.io or Trip.com for the best deals.
Day 14: From Palawan to Cebu
On Day 14 of your 3 Week Philippines Itinerary, you’ll travel from the serene beauty of Palawan to the bustling island of Cebu. Known for its rich history, vibrant culture, and stunning natural attractions, Cebu is a must-visit destination in the Philippines. Whether you’re exploring its historical landmarks, diving in its crystal-clear waters, or relaxing on its beautiful beaches, Cebu offers something for everyone. Here’s a detailed guide to help you plan your journey from Palawan to Cebu.
Getting from Palawan to Cebu
The journey from Palawan to Cebu involves a combination of land and air travel. Here’s how to do it:
Step 1: Puerto Princesa to Manila
- By Flight: Take a domestic flight from Puerto Princesa to Manila.
- Airlines: Cebu Pacific, Philippine Airlines, and AirAsia offer frequent flights.
- Travel Time: 1.5 hours.
- Cost: Flights start at around PHP 2,000 (USD 40) one way.
Tips for Flying:
- Book your flight in advance to secure the best prices.
- Arrive at the airport at least 2 hours before departure.
Step 2: Manila to Cebu
- By Flight: From Manila, take a domestic flight to Cebu.
- Airlines: Cebu Pacific, Philippine Airlines, and AirAsia offer frequent flights.
- Travel Time: 1.5 hours.
- Cost: Flights start at around PHP 2,000 (USD 40) one way.
Tips for Flying:
- Book your flight in advance, especially during peak season.
- Choose a flight that connects smoothly with your arrival from Puerto Princesa.
Arriving in Cebu
Once you arrive in Cebu, check into your accommodation and take some time to rest after your journey. Here are some recommended hotels:
- Shangri-La Mactan Resort & Spa: A luxurious beachfront resort with world-class amenities.
- Quest Hotel & Conference Center: A mid-range option with modern facilities.
- Cebu R Hotel: A budget-friendly hotel with a central location.
For the best deals, book your stay via WayAway.io or Trip.com.
Things to Do in Cebu
If you arrive early and have some energy left, here are a few activities to kick off your Cebu adventure:
1. Visit Magellan’s Cross
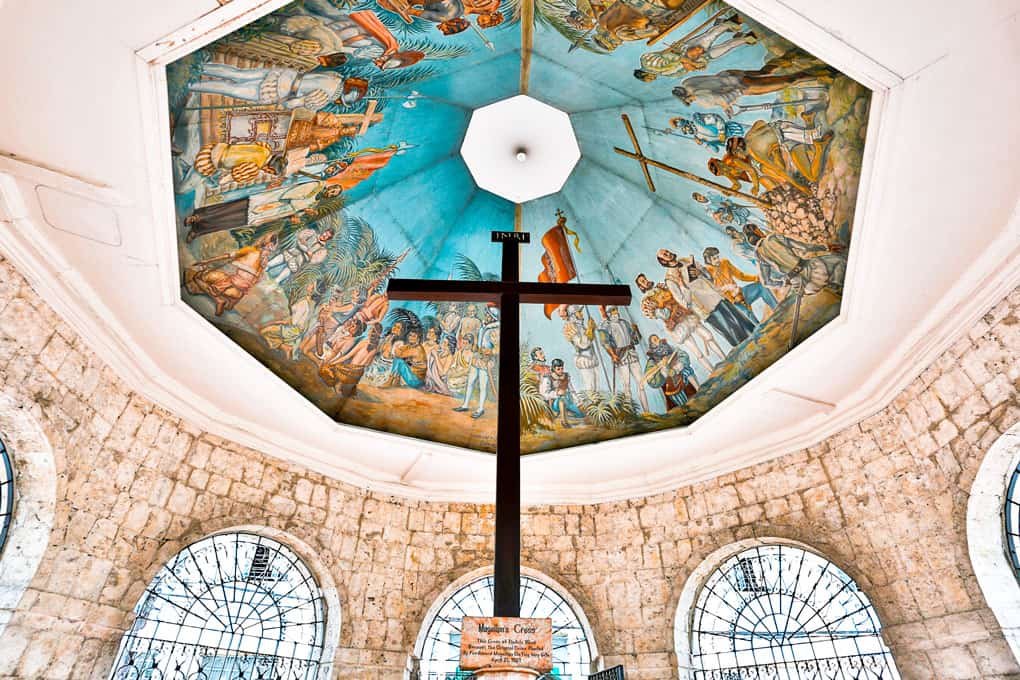
- Located in downtown Cebu City, Magellan’s Cross is a historic landmark that marks the spot where Ferdinand Magellan planted a cross in 1521.
- Learn about Cebu’s rich history and take photos of this iconic site.
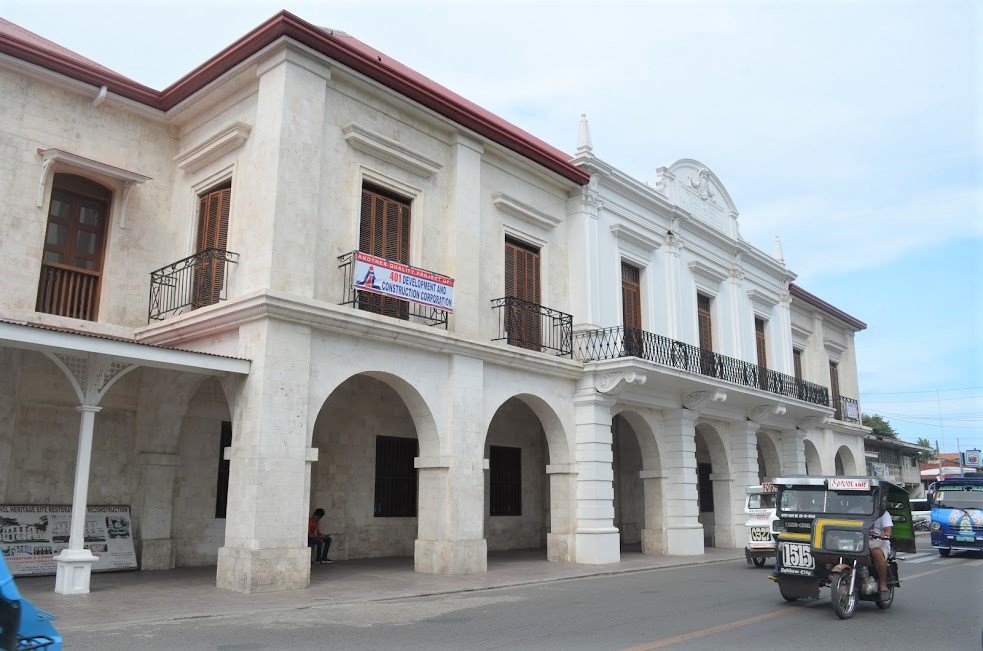
2. Explore Fort San Pedro
- Fort San Pedro is the oldest triangular bastion fort in the Philippines, built by Spanish conquistadors in the 16th century.
- Explore the fort’s museum and enjoy panoramic views of the city.
3. Stroll Along Colon Street
- Colon Street is the oldest street in the Philippines and a bustling hub of activity.
- Shop for souvenirs, try local street food, and soak in the vibrant atmosphere.
4. Try Local Cuisine
- Sample Cebu’s famous lechon (roast pig) and other local dishes at restaurants like ZTaloto’s Lechon Belly and Casa Verde.
Tips for Day 14
- Pack Light: Bring only the essentials for your stay in Cebu.
- Stay Hydrated: Drink plenty of water, especially after a long day of travel.
- Rest Up: Get a good night’s sleep to prepare for the adventures ahead.
Day 14 of your 3 Week Philippines Itinerary is all about transitioning from the serene beauty of Palawan to the vibrant island of Cebu. While it’s mostly a travel day, arriving in Cebu marks the beginning of an exciting new chapter in your Philippine adventure.
For more travel inspiration, check out our Philippines Travel Budget Guide and El Nido Travel Guide. Don’t forget to book your accommodations via WayAway.io or Trip.com for the best deals.
Day 15: From Cebu to Bohol
On Day 15 of your 3 Week Philippines Itinerary, you’ll travel from the bustling island of Cebu to the serene and picturesque island of Bohol. Known for its iconic Chocolate Hills, adorable tarsiers, and pristine beaches, Bohol is a must-visit destination that offers a perfect blend of natural beauty and cultural experiences. Here’s a detailed guide to help you plan your journey from Cebu to Bohol.
Getting from Cebu to Bohol
The journey from Cebu to Bohol is relatively short and straightforward, with multiple transportation options available.
Option 1: By Ferry (Most Popular)
- Ferry Operators: OceanJet and SuperCat operate fast ferries between Cebu and Bohol.
- Departure Point: Ferries depart from Cebu Pier 1 and arrive at Tagbilaran Port in Bohol.
- Travel Time: 2 hours.
- Cost: Approximately PHP 500-700 (USD 10-14) one way.
Tips for Ferry Travel:
- Book your ticket in advance, especially during peak season.
- Arrive at the port at least 1 hour before departure.
- Bring motion sickness medication if you’re prone to seasickness.
Option 2: By Flight (Fastest Option)
- Airlines: Cebu Pacific and Philippine Airlines offer flights from Cebu to Tagbilaran.
- Travel Time: 30 minutes.
- Cost: Flights start at around PHP 2,000 (USD 40) one way.
Tips for Flying:
- Flights are limited and can be expensive, so book early.
- This option is ideal if you’re short on time or prefer to avoid sea travel.
Arriving in Bohol
Once you arrive in Bohol, check into your accommodation and take some time to relax. Here are some recommended hotels:
- Amorita Resort: A luxurious beachfront resort with stunning views of the sea.
- Bohol Beach Club: A mid-range option with direct access to Alona Beach.
- Moon Fools Hostel: A budget-friendly option with a social atmosphere.
Find the best hotel deals for your next trip! Compare prices and book your stay on
HostelWorld (Amazing Hostels & Hotels around the world)
TripAdvisor (Compare hotels, read real reviews, and find the best prices)
Things to Do in Bohol
If you arrive early and have some energy left, here are a few activities to kick off your Bohol adventure:
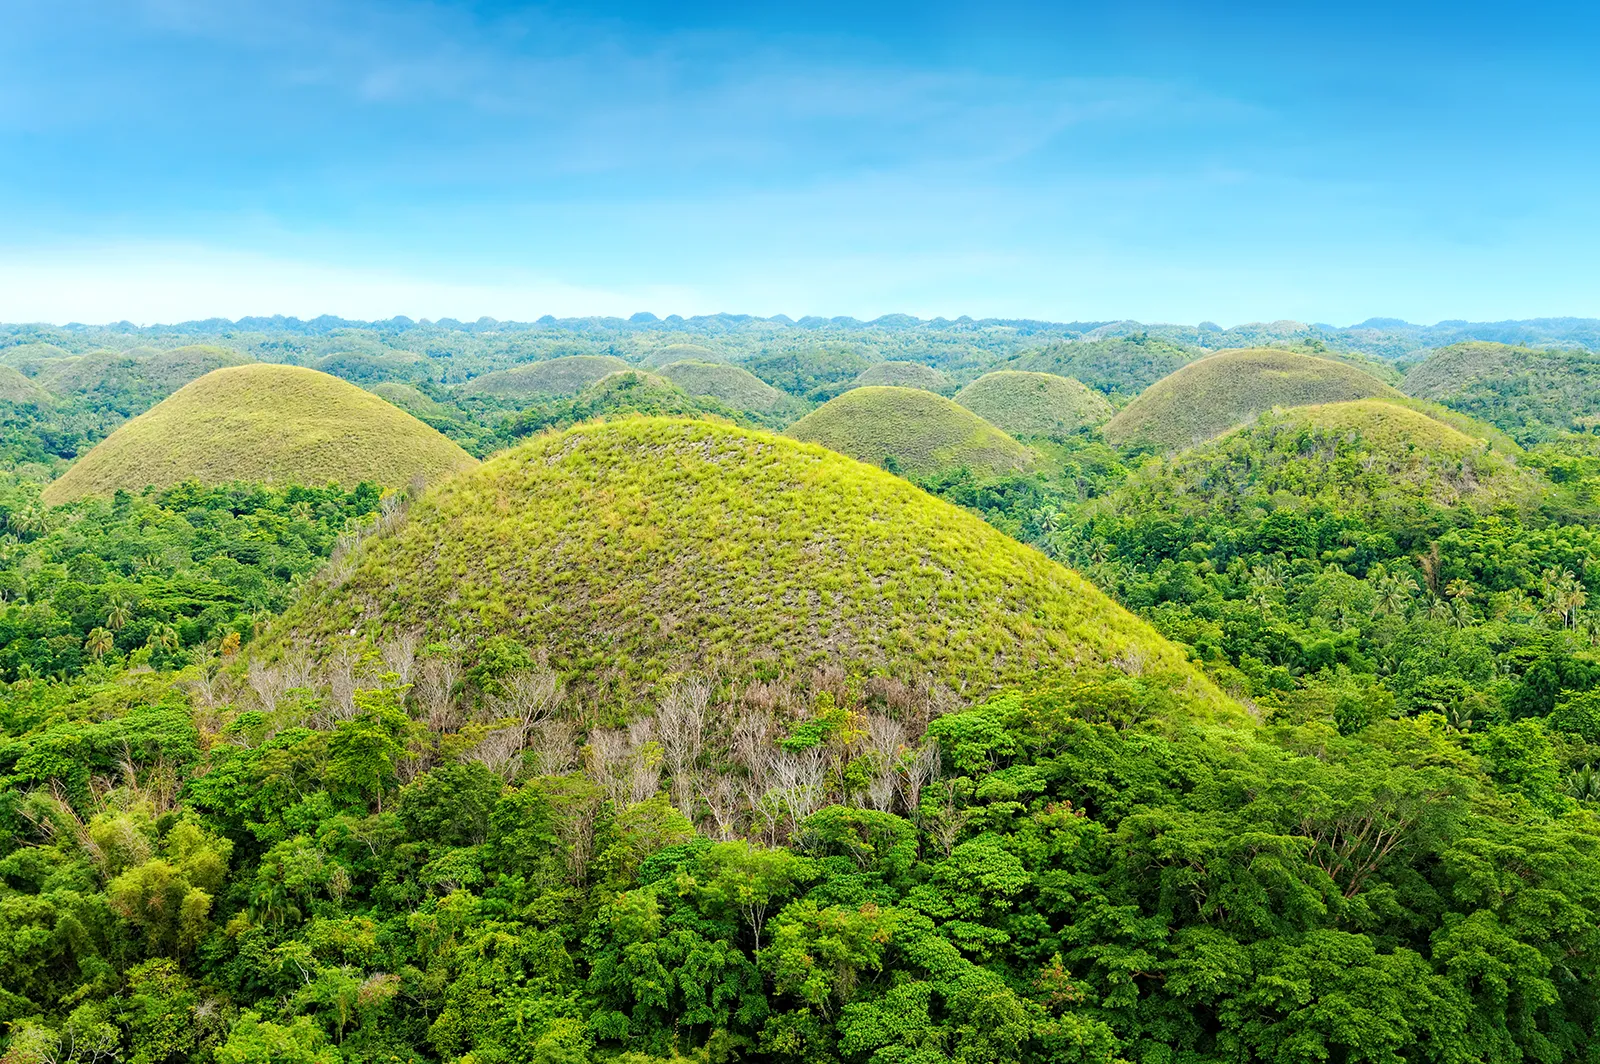
1. Visit the Chocolate Hills
- The Chocolate Hills are Bohol’s most iconic attraction, with over 1,200 cone-shaped hills that turn brown during the dry season.
- Head to the Chocolate Hills Complex in Carmen for the best views.
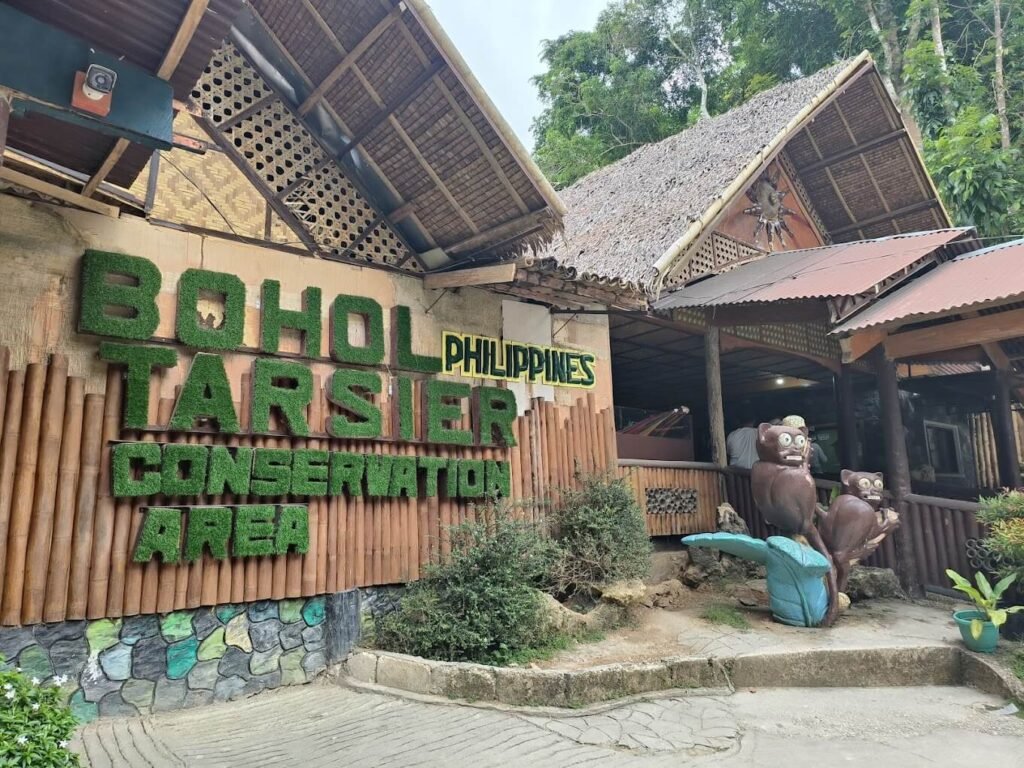
2. Meet the Tarsiers
- Visit the Philippine Tarsier Sanctuary in Corella to see the world’s smallest primates up close.
- Learn about conservation efforts and observe these adorable creatures in their natural habitat.
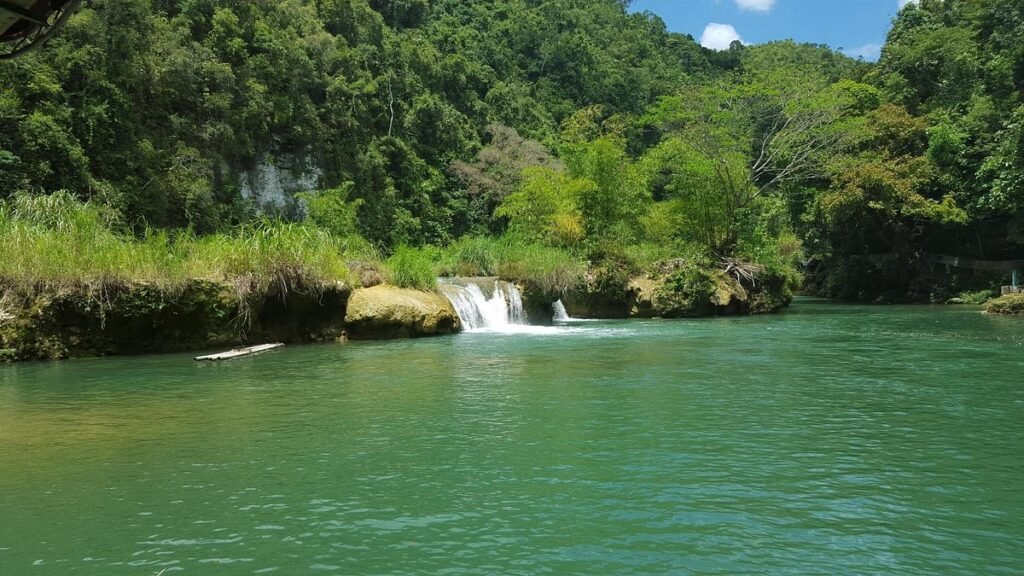
3. Explore Loboc River
- Take a relaxing Loboc River Cruise and enjoy a buffet lunch while floating along the serene river.
- The cruise also includes live music and stops at a small waterfall.
4. Relax at Alona Beach
- End your day at Alona Beach, one of Bohol’s most beautiful beaches.
- Swim in the crystal-clear waters or enjoy a sunset drink at a beachfront bar.
Tips for Day 15
- Pack Light: Bring only the essentials for your stay in Bohol.
- Stay Hydrated: Drink plenty of water, especially after a day of travel.
- Rest Up: Get a good night’s sleep to prepare for the adventures ahead.
Day 15 of your 3 Week Philippines Itinerary is all about transitioning from the vibrant island of Cebu to the serene beauty of Bohol. While it’s mostly a travel day, arriving in Bohol marks the beginning of an exciting new chapter in your Philippine adventure.
Day 16: Loboc (Bohol)
On Day 16 of your 3 Week Philippines Itinerary, you’ll explore the charming town of Loboc in Bohol. Known for its lush landscapes, serene river, and cultural attractions, Loboc is a must-visit destination that offers a perfect blend of nature and heritage. Here’s a detailed guide to help you make the most of your day in Loboc.
Getting to Loboc
Loboc is located approximately 24 kilometers (15 miles) from Tagbilaran City, the capital of Bohol. Here’s how to get there:
Option 1: By Van or Taxi
- Travel Time: 30-40 minutes.
- Cost: Around PHP 500-700 (USD 10-14) for a one-way trip.
Option 2: By Public Bus or Jeepney
- Travel Time: 1-1.5 hours.
- Cost: Approximately PHP 25-50 (USD 0.50-1) per person.
Tips for Traveling to Loboc:
- If you’re staying in Panglao or Tagbilaran, arrange for a private van or taxi for convenience.
- Public transportation is cheaper but less comfortable and slower.
Things to Do in Loboc

1. Loboc River Cruise
- The Loboc River Cruise is one of Bohol’s most popular activities, offering a relaxing and scenic experience.
- Enjoy a buffet lunch of local dishes while floating along the serene river.
- The cruise includes live music and a stop at a small waterfall.
Tips for the River Cruise:
- Book your cruise in advance, especially during peak season.
- Bring a camera to capture the beautiful scenery.
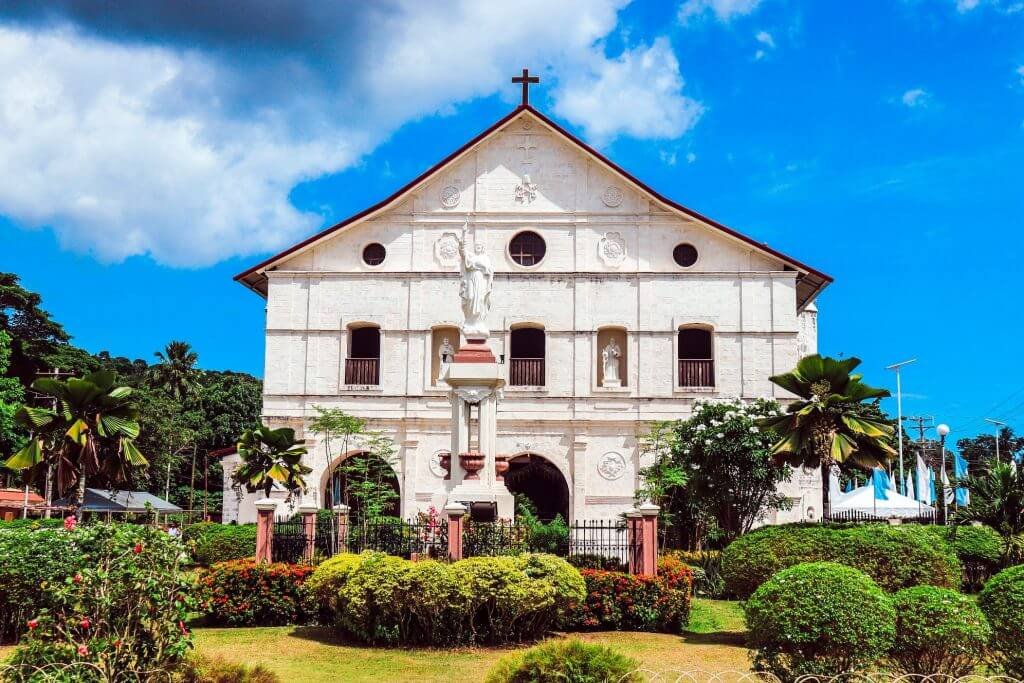
2. Visit the Loboc Church
- The San Pedro Apostol Parish Church, also known as Loboc Church, is one of the oldest stone churches in the Philippines.
- Admire the church’s Baroque architecture and historical artifacts.
3. Explore the Loboc Eco-Tourism Adventure Park
- For thrill-seekers, the Loboc Eco-Tourism Adventure Park offers activities like zip-lining and cable car rides.
- Enjoy panoramic views of the river and surrounding landscapes.
4. Visit the Tarsier Conservation Area
- On your way to or from Loboc, stop by the Philippine Tarsier Sanctuary in Corella to see the world’s smallest primates.
- Learn about conservation efforts and observe these adorable creatures in their natural habitat.
5. Relax at Busay Falls
- Take a short hike to Busay Falls, a hidden gem near Loboc.
- Enjoy a refreshing dip in the cool waters and soak in the peaceful atmosphere.
Where to Eat in Loboc
- Loboc Riverwatch Floating Restaurant: Enjoy a buffet lunch while cruising along the Loboc River.
- Payag Restaurant: A local favorite serving traditional Filipino dishes.
- Loboc Food Park: A great spot to try street food and local snacks.
Tips for Day 16
- Wear Comfortable Clothing: Choose light, breathable clothes for the river cruise and outdoor activities.
- Bring Cash: Some attractions and restaurants may not accept credit cards.
- Stay Hydrated: Drink plenty of water, especially if you’re hiking or zip-lining.
Day 16 of your 3 Week Philippines Itinerary is all about exploring the natural beauty and cultural heritage of Loboc. From the serene Loboc River Cruise to the historic Loboc Church and thrilling eco-adventures, this day offers a perfect blend of relaxation and excitement.
Day 17-18: Panglao (Bohol)
On Days 17 and 18 of your 3 Week Philippines Itinerary, you’ll explore the stunning island of Panglao, located just off the coast of Bohol. Known for its pristine beaches, vibrant marine life, and luxurious resorts, Panglao is a tropical paradise that offers the perfect blend of relaxation and adventure. Here’s a detailed guide to help you make the most of your time in Panglao.
Getting to Panglao
Panglao is easily accessible from Tagbilaran City, the capital of Bohol. Here’s how to get there:
Option 1: By Van or Taxi
- Travel Time: 30-40 minutes.
- Cost: Around PHP 500-700 (USD 10-14) for a one-way trip.
Option 2: By Public Bus or Jeepney
- Travel Time: 1-1.5 hours.
- Cost: Approximately PHP 25-50 (USD 0.50-1) per person.
Tips for Traveling to Panglao:
- If you’re staying in Tagbilaran or Loboc, arrange for a private van or taxi for convenience.
- Public transportation is cheaper but less comfortable and slower.
Things to Do in Panglao
Day 17: Beach Day and Island Hopping
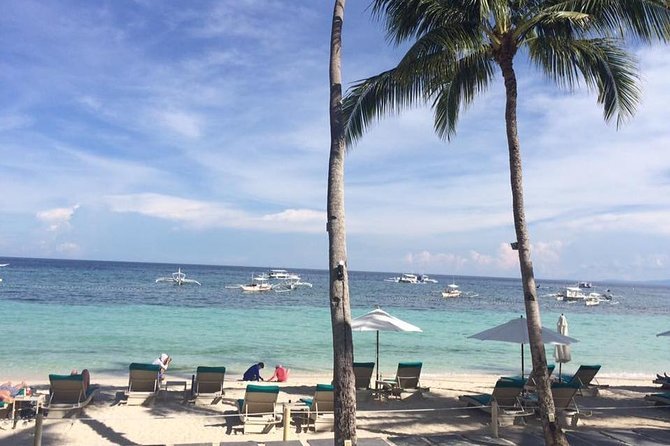
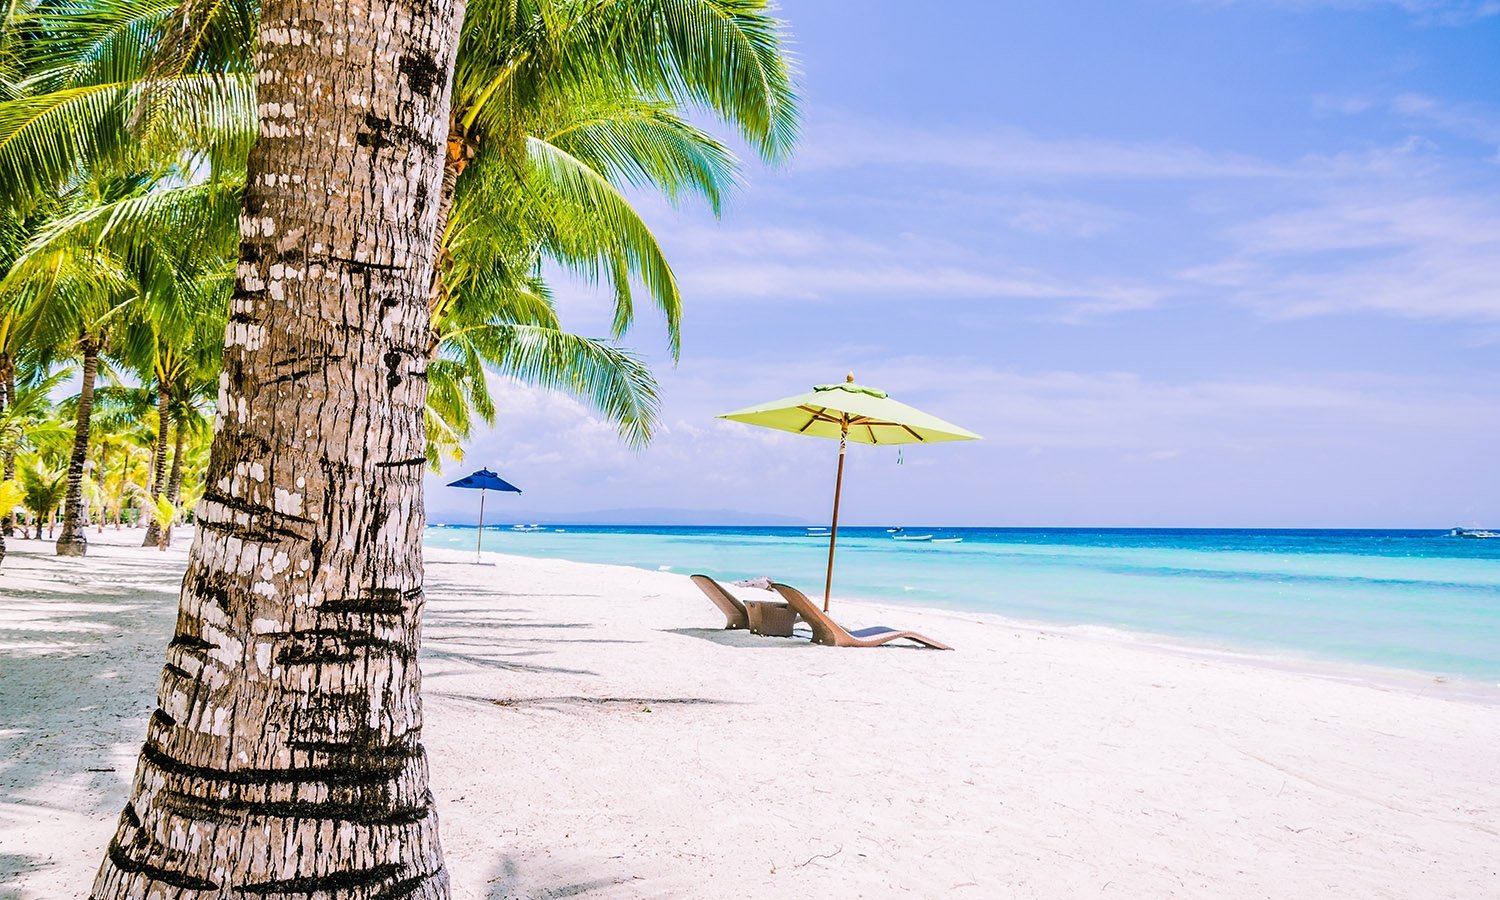
1. Relax at Alona Beach
- Alona Beach is Panglao’s most famous beach, known for its powdery white sand and crystal-clear waters.
- Spend the morning swimming, sunbathing, or simply relaxing under the shade of a palm tree.
2. Island Hopping Tour
- Join an Island Hopping Tour to explore the nearby islands and snorkeling spots.
- Highlights of the Tour:
- Balicasag Island: Famous for its vibrant coral reefs and diverse marine life.
- Pamilacan Island: Known for its pristine beaches and dolphin-watching opportunities.
- Virgin Island: A sandbar that appears during low tide, perfect for photos and relaxation.
Tips for Island Hopping:
- Book your tour in advance, especially during peak season.
- Bring a waterproof bag for your belongings and plenty of sunscreen.
3. Enjoy a Sunset Dinner
- End your day with a sunset dinner at one of Alona Beach’s beachfront restaurants.
- Recommended restaurants: Luna Rossa Vegetarian Italian Restaurant and Giuseppe Pizzeria & Sicilian Roast.
Day 18: Diving and Exploring Panglao
1. Scuba Diving or Snorkeling
- Panglao is a diver’s paradise, with world-class dive sites like Balicasag Island and Doljo Beach.
- Join a Discover Scuba Diving course if you’re not certified, or go snorkeling to explore the vibrant coral reefs.
Tips for Diving:
- Book with a reputable dive operator like Sea Explorers or Bohol Divers Club.
- Bring a GoPro or underwater camera to capture the marine life.
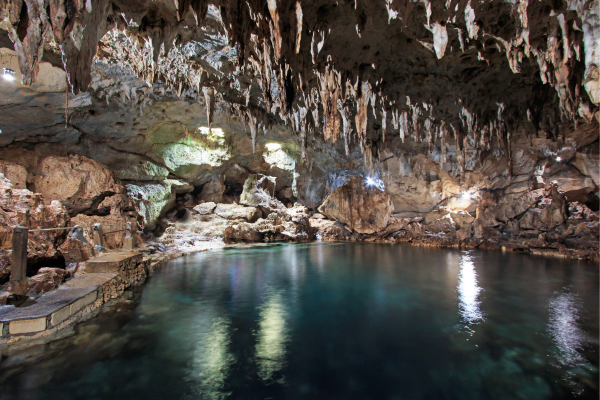
2. Visit Hinagdanan Cave
- Explore Hinagdanan Cave, a natural limestone cave with a stunning underground pool.
- Swim in the cool, clear waters or simply admire the cave’s unique formations.
3. Relax at Dumaluan Beach
- Head to Dumaluan Beach, a quieter alternative to Alona Beach.
- Enjoy the peaceful atmosphere and stunning views of the sea.
4. Try Local Cuisine
- Sample Bohol’s local dishes, such as lechon (roast pig) and kalamay (sweet rice cake).
- Recommended restaurants: Bohol Bee Farm and The Buzzz Café.
Where to Stay in Panglao
- Amorita Resort: A luxurious beachfront resort with stunning views of the sea.
- Bohol Beach Club: A mid-range option with direct access to Alona Beach.
- Moon Fools Hostel: A budget-friendly option with a social atmosphere.
For the best deals, book your stay via WayAway.io or Trip.com.
Tips for Days 17-18 in Panglao
- Pack Light: Bring only the essentials for your beach and diving activities.
- Stay Hydrated: Drink plenty of water, especially during outdoor activities.
- Respect the Environment: Avoid touching coral or littering to help preserve Panglao’s natural beauty.
Your two days in Panglao will be filled with unforgettable experiences, from relaxing on pristine beaches to exploring vibrant coral reefs and unique caves. These days are a highlight of your 3 Week Philippines Itinerary, offering a perfect blend of adventure and relaxation.
Day 19: Tagbilaran (Bohol)

On Day 19 of your 3 Week Philippines Itinerary, you’ll explore Tagbilaran City, the capital of Bohol. While Tagbilaran is often seen as a transit hub, it has its own charm and a variety of cultural and historical attractions worth exploring. This day is all about immersing yourself in the local culture, history, and cuisine before heading back to Manila. Here’s a detailed guide to help you make the most of your time in Tagbilaran.
Getting to Tagbilaran
Tagbilaran is easily accessible from Panglao and other parts of Bohol. Here’s how to get there:
Option 1: By Van or Taxi
- Travel Time: 30-40 minutes from Panglao.
- Cost: Around PHP 500-700 (USD 10-14) for a one-way trip.
Option 2: By Public Bus or Jeepney
- Travel Time: 1-1.5 hours from Panglao.
- Cost: Approximately PHP 25-50 (USD 0.50-1) per person.
Tips for Traveling to Tagbilaran:
- If you’re staying in Panglao, arrange for a private van or taxi for convenience.
- Public transportation is cheaper but less comfortable and slower.
Things to Do in Tagbilaran
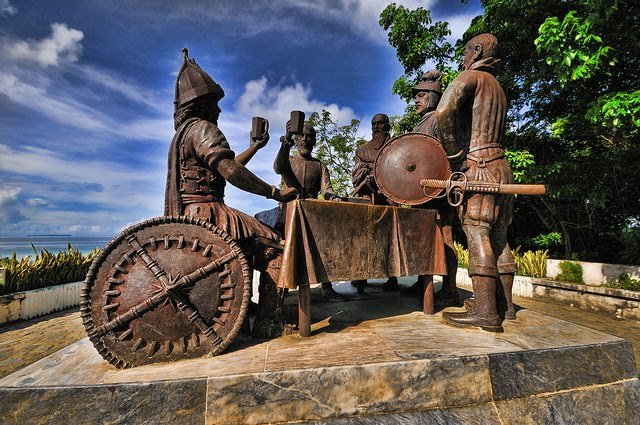
1. Visit the Blood Compact Shrine
- The Blood Compact Shrine commemorates the first international treaty of friendship between the Spanish explorer Miguel López de Legazpi and the local chieftain Datu Sikatuna in 1565.
- Learn about this historic event and take photos of the iconic statue.
2. Explore the Bohol National Museum
- The Bohol National Museum offers insights into the island’s history, culture, and natural heritage.
- Admire artifacts, historical documents, and exhibits on Bohol’s flora and fauna.
3. Stroll Along Carlos P. Garcia Avenue
- Named after the eighth President of the Philippines, this avenue is a great place to experience local life.
- Shop for souvenirs, try street food, and soak in the vibrant atmosphere.
4. Visit the St. Joseph the Worker Cathedral
- The St. Joseph the Worker Cathedral is one of the oldest churches in Bohol, with a rich history dating back to the Spanish colonial period.
- Admire the church’s architecture and peaceful ambiance.
5. Try Local Cuisine
- Sample Bohol’s local dishes, such as lechon (roast pig), kalamay (sweet rice cake), and binagol (a dessert made from taro and coconut milk).
- Recommended restaurants: Gerarda’s Place and The Buzzz Café.
Where to Stay in Tagbilaran
If you’re staying overnight in Tagbilaran, here are some recommended hotels:
- Metrocentre Hotel & Convention Center: A mid-range option with modern amenities.
- Bohol Tropics Resort: A beachfront resort with a relaxing atmosphere.
- Tr3ats Guesthouse: A budget-friendly option with a cozy vibe.
Find the best hotel deals for your next trip! Compare prices and book your stay on
HostelWorld (Amazing Hostels & Hotels around the world)
TripAdvisor (Compare hotels, read real reviews, and find the best prices)
Tips for Day 19
- Wear Comfortable Clothing: Choose light, breathable clothes for exploring the city.
- Bring Cash: Some attractions and restaurants may not accept credit cards.
- Stay Hydrated: Drink plenty of water, especially if you’re walking around the city.
Day 19 of your 3 Week Philippines Itinerary is all about exploring the cultural and historical attractions of Tagbilaran City. From the iconic Blood Compact Shrine to the peaceful St. Joseph the Worker Cathedral, this day offers a perfect blend of history and local culture.
Day 20: From Bohol to Manila
On Day 20 of your 3 Week Philippines Itinerary, it’s time to bid farewell to the stunning island of Bohol and return to Manila. While this day is mostly about travel, it’s also an opportunity to reflect on your incredible journey through the Philippines. Here’s a detailed guide to help you plan your journey from Bohol to Manila, including transportation options, things to do, and tips for a smooth trip.
Getting from Bohol to Manila
The journey from Bohol to Manila involves a combination of land and air travel. Here’s how to do it:
Step 1: Tagbilaran to Cebu
- By Ferry: Take a fast ferry from Tagbilaran Port to Cebu City.
- Ferry Operators: OceanJet and SuperCat operate frequent trips.
- Travel Time: 2 hours.
- Cost: Approximately PHP 500-700 (USD 10-14) one way.
Tips for Ferry Travel:
- Book your ticket in advance, especially during peak season.
- Arrive at the port at least 1 hour before departure.
- Bring motion sickness medication if you’re prone to seasickness.
Step 2: Cebu to Manila
- By Flight: From Cebu, take a domestic flight to Manila.
- Airlines: Cebu Pacific, Philippine Airlines, and AirAsia offer frequent flights.
- Travel Time: 1.5 hours.
- Cost: Flights start at around PHP 2,000 (USD 40) one way.
Tips for Flying:
- Book your flight in advance to secure the best prices.
- Arrive at the airport at least 2 hours before departure.
Arriving in Manila
Once you arrive in Manila, check into your accommodation and take some time to relax. Here are some recommended hotels:
- The Peninsula Manila: A luxurious option with world-class amenities.
- Red Planet Manila: A budget-friendly hotel with a central location.
- Zula Hostel: A social and affordable option for solo travelers.
Book Your Stay in Manila
For the best deals, book your stay via WayAway.io or Trip.com.
Things to Do in Manila
If you arrive early and have some energy left, here are a few activities to enjoy in Manila:
1. Visit Intramuros
- Intramuros is the historic walled city of Manila, offering a glimpse into the country’s colonial past.
- Explore landmarks like Fort Santiago, San Agustin Church, and Casa Manila.
2. Shop at SM Mall of Asia
- The SM Mall of Asia is one of the largest malls in the Philippines, offering a wide range of shopping, dining, and entertainment options.
- Enjoy a meal at one of the mall’s many restaurants or catch a movie at the IMAX theater.
3. Relax at Rizal Park
- Rizal Park is a peaceful oasis in the heart of Manila, perfect for a leisurely stroll or a picnic.
- Visit the Rizal Monument and learn about the national hero, José Rizal.
4. Try Local Cuisine
- Sample Manila’s local dishes, such as adobo, sinigang, and halo-halo.
- Recommended restaurants: Manila Hotel’s Café Ilang-Ilang and Barbara’s Heritage Restaurant.
Tips for Day 20
- Pack Light: Bring only the essentials for your stay in Manila.
- Stay Hydrated: Drink plenty of water, especially after a long day of travel.
- Rest Up: Get a good night’s sleep to prepare for your journey home.
Day 20 of your 3 Week Philippines Itinerary is all about transitioning from the serene beauty of Bohol back to the bustling city of Manila. While it’s mostly a travel day, arriving in Manila marks the end of an unforgettable journey through the Philippines.
3 Week Philippines Itinerary: In Conclusion
Your 3 Week Philippines Itinerary has taken you through some of the most stunning destinations in the country, from the rice terraces of Banaue to the pristine beaches of Palawan and the cultural treasures of Bohol. Each day has been filled with unforgettable experiences, offering a perfect blend of adventure, relaxation, and cultural immersion.
As you reflect on your journey, we hope you’ve fallen in love with the Philippines’ natural beauty, warm hospitality, and rich heritage. Whether you’re planning your next trip or sharing your stories with friends and family, the memories of your 3 Week Philippines Itinerary will stay with you forever.
We hope this 3 Week Philippines Itinerary Map has inspired you to explore the beauty of the Philippines. Safe travels and enjoy your adventure!
For more travel inspiration, check out our Philippines Travel Budget Guide and our 3 Week Philippines Itinerary. Don’t forget to book your accommodations via WayAway.io or Trip.com for the best deals.